Hieromancer's Armor: Difference between revisions
From Drunkapedia
imported>An Adventurer m (→Ishilai Lyceum) |
imported>An Adventurer (adding more images to the galley) |
||
| (15 intermediate revisions by 4 users not shown) | |||
| Line 1: | Line 1: | ||
{{Quest Summary | {{Quest Summary | ||
| | | Level = Any | ||
| | | Recommended Level = | ||
| Quest Type = Solo | | Quest Type = Solo | ||
| | | Starts With = [[Zairente Ra-Yao]] | ||
| | | Starts At = [[Linvak Mountains]] (random spawn) | ||
| | | Route = | ||
| Repeat Timer = 20 Hours | |||
| Time to Complete = | |||
| | | Contracts = | ||
| | |||
| | |||
}} | }} | ||
== | == Overview == | ||
=== Obtain Supplies === | * The armor from this quest may be further upgraded via the [[Halls of Knorr]] quest. | ||
* This quest requires some lever pulling, but the doors stay open long enough for a single person to complete it. | |||
== Walkthrough & Notes == | |||
=== Part 1: Obtain Supplies === | |||
# Locate the randomly appearing wilderness vendors, or obtain their items from other players. | # Locate the randomly appearing wilderness vendors, or obtain their items from other players. | ||
#* [[Zairente Ra-Yao]] - Sells | #* [[Zairente Ra-Yao]] - Sells {{Itemlink|Peculiar Old Dagger}}, a required item. | ||
#* | #* {{Optional}} [[Hasina bint Rira]] - Sells {{Itemlink|Puzzle Box (Hieromancer's Armor)|Puzzle Box}}. Used to obtain the [[Decoded Untranslated Text]]. | ||
#* | #* {{Optional}} [[Spertat the Ursuin Hunter]] - Sells {{Itemlink|Unreadable Text}}. Used to obtain the Decoded Untranslated Text. | ||
# Obtain a | # Obtain a {{Itemlink|Vial of Organic Acid}}, a low drop rate trophy from various [[Grievver]]s, including [[Virulent Grievver]]s, [[Venomous Grievver]]s, [[Bile Grievver]]s, [[Bane Grievver]]s and [[Harrower Grievver]]s | ||
# Use the acid on the dagger to obtain the | #* Note: The [[Cave of the Escaped Thief]] at 71.1N, 50.2W (landscape, no level requirement) from the [[Sword of Bellenesse]] quest is ideal for quickly hunting down a {{Itemlink|Vial of Organic Acid}}, as it is populated by numerous high-level Grievvers on a quick spawn. | ||
# Use the acid on the dagger to obtain the {{Itemlink|Glittering Crystalline Key}}. | |||
# Locate a [[Humming Crystal Portal]], which spawns randomly in certain wilderness areas like the Direlands and Linvak Mountain Range. The portal is tiable, though not summonable, so if you chance across it before you have the acid or dagger you can save the tie. | # Locate a [[Humming Crystal Portal]], which spawns randomly in certain wilderness areas like the Direlands and Linvak Mountain Range. The portal is tiable, though not summonable, so if you chance across it before you have the acid or dagger you can save the tie. | ||
# At the [[Humming Crystal]], use the | # At the [[Humming Crystal]], use the Glittering Crystalline Key on the [[Strange Humming Crystal]] to obtain the {{Itemlink|Lyceum Recall Gem}}. | ||
The following steps can be done in either order, and there are advantages to each. | The following steps can be done in either order, and there are advantages to each. | ||
: '''Advantages of going to the Hieromancer Halls first: | : '''Advantages of going to the Hieromancer Halls first:''' | ||
:* If you are already at the Humming Crystal, the exit portals will bring you very close to the Halls. | :* If you are already at the Humming Crystal, the exit portals will bring you very close to the Halls. | ||
:* If you want the | :* If you want the {{Itemlink|Globe of Auberean}}, made from the {{Itemlink|Blue Orb}}, you must obtain the blue orb in the Halls before heading to the Lyceum. | ||
: '''Advantage of going to the Lyceum first: | : '''Advantage of going to the Lyceum first:''' | ||
:* If you want to experiment with the color of your armor, or are unsure of your success rate, it is better to obtain the unkindled armor first and then go to the Halls, where you can pick up as many kindling stones as you need. | :* If you want to experiment with the color of your armor, or are unsure of your success rate, it is better to obtain the unkindled armor first and then go to the Halls, where you can pick up as many kindling stones as you need. | ||
=== Hieromancer's Halls === | === Part 2: Hieromancer's Halls === | ||
# While still at the [[Humming Crystal]], tie to or use the [[Exit Portal (Humming Crystal)|Exit Portal]]. It drops close to the [[Hieromancers' Halls]] | # While still at the [[Humming Crystal]], tie to or use the [[Exit Portal (Humming Crystal)|Exit Portal]]. It drops close to the [[Hieromancers' Halls]] | ||
# Enter the Halls. Follow the map to reach the Kindling | # Enter the Halls. Follow the map to reach the {{Itemlink|Silver Kindling Stone}}, {{Itemlink|Sea Blue Kindling Stone}} and {{Itemlink|Sea Grey Kindling Stone}}. | ||
# Obtain the Kindling stones you need. Color is purely for style and has no effect on the stats or spells on the finished armor. If you want Thaumaturgic Plate Armor - armor for trained War Magic - you need 1 stone per piece of armor. If you want Exarch Plate Armor - armor for specialized War Magic - you need 2 stones per piece of armor. | # Obtain the Kindling stones you need. It takes about 25 seconds for the stone to respawn. Color is purely for style and has no effect on the stats or spells on the finished armor. If you want Thaumaturgic Plate Armor - armor for trained War Magic - you need 1 stone per piece of armor. If you want Exarch Plate Armor - armor for specialized War Magic - you need 2 stones per piece of armor. | ||
# | # {{Optional}} After obtaining your kindling stones, head deeper in to obtain the {{Itemlink|Blue Orb}}. | ||
=== Ishilai Lyceum === | === Part 3: Ishilai Lyceum === | ||
# Use the | # Use the Lyceum Recall Gem to send yourself to the [[Ishilai Lyceum]]. | ||
# Take the | # Take the {{Itemlink|Slip of Paper}} and present it to [[Eaushi the Trainer]]. It will teleport you into the [[Lyceum Training Grounds]]. | ||
# Take the west hallway for the easiest difficulty test. Kill the [[ | # Take the west hallway for the easiest difficulty test. Kill the [[Tenuous Nephol Golem]] and loot the {{Itemlink|Small Pale Crystal}}. You may have to kill several golems before obtaining a crystal. Take the exit portal. | ||
# Re-enter the Training Grounds. Take the | # Re-enter the Training Grounds. Take the north hallway for the middle difficulty test. Kill the [[Diaphanous Nephol Golem]] and loot the {{Itemlink|Pale Crystal}}. You may have to kill several golems before obtaining a crystal. Take the exit portal. | ||
# Re-enter the Training Grounds. Take the | # Re-enter the Training Grounds. Take the east hallway for the hardest difficulty test. Kill the [[Turbid Nephol Golem]] and loot the {{Itemlink|Large Pale Crystal}}. You may have to kill several golems before obtaining a crystal. Take the exit portal. | ||
# Present the three crystals to Eaushi the Trainer | # Present the three crystals to Eaushi the Trainer to receive {{Itemlink|Unkindled Thaumaturgic Plate Coat}}, {{Itemlink|Unkindled Thaumaturgic Plate Girth}} and {{Itemlink|Unkindled Thaumaturgic Plate Leggings}}. | ||
# | # {{Optional}} While at the Lyceum, complete any of the following tasks. | ||
#* Kill a [[Guardian Golem]]. Loot the | #* Kill a [[Guardian Golem]]. Loot the {{Itemlink|Trunk Key}} from its corpse. Unlock the [[Trunk]] to obtain {{Itemlink|Sasalia's Dress}}. | ||
#* Head out of the castle and to the upper building and obtain the | #* Head out of the castle and to the upper building and obtain the {{Itemlink|Lightweight Tome}}, found in the basement library. | ||
#* If you obtained a Blue Orb in the Hieromancer's Halls, give it to Eaushi the Trainer to obtain the | #* If you obtained a Blue Orb in the Hieromancer's Halls, give it to Eaushi the Trainer to obtain the {{Itemlink|Globe of Auberean}}. | ||
#* Enter the Lyceum Training Grounds. Kill the golems until one drops a | #* Enter the Lyceum Training Grounds. Kill the golems until one drops a {{Itemlink|Sunstone Geode}}. Give it to Eaushi the Trainer to obtain the {{Itemlink|Hieromancer's Orb}}. | ||
#* Enter the Lyceum Training Grounds. With Lockpick, unlock the 350 resistance chest and loot | #* Enter the Lyceum Training Grounds. With Lockpick, unlock the 350 resistance chest and loot {{Itemlink|A Boot}} and {{Itemlink|Another Boot}}. Combine to create the {{Itemlink|Boots of the Vault}}. | ||
#* While at the Lyceum, present Eaushi the Trainer with the various items from this quest. The golem often gives a response. | #* While at the Lyceum, present Eaushi the Trainer with the various items from this quest. The golem often gives a response. | ||
=== Kindling === | === Part 4: Kindling === | ||
# Add one kindling stone to each piece of armor to create Thaumaturgic Plate Armor - armor for trained War Magic. | # Add one kindling stone to each piece of armor to create Thaumaturgic Plate Armor - armor for trained War Magic. | ||
# Add a second kindling stone to each piece of armor to create Exarch Plate Armor - armor for specialized War Magic. | # Add a second kindling stone to each piece of armor to create Exarch Plate Armor - armor for specialized War Magic. | ||
# Failing any step reverts the piece to the unkindled state. | |||
# Skill increases chances of applying the kindling stone, but there is no hard cap. It is recommended that you apply the kindling stones in the Heiromancer's Hall if you are lower level to have unlimited chances. | |||
# Adding a third stone to a piece of Exarch Plate Armor reverts it to the unkindled state, allowing for the color to be changed. | |||
== Maps == | == Dungeons & Maps == | ||
{{Dungeon Table | {{Dungeon Table | ||
| Table Rows = | | Table Rows = | ||
{{Dungeon Maps | {{Dungeon Maps | ||
| Dungeon = Lyceum Training Grounds | | Dungeon = Lyceum Training Grounds | ||
| Coordinates = | | Coordinates = From [[Ishilai Lyceum]] | ||
| Wiki Map File = | | Wiki Map File = | ||
| ACmaps ID = 0112 | | ACmaps ID = 0112 | ||
}} | }} | ||
{{Dungeon Maps | {{Dungeon Maps | ||
| Dungeon = Hieromancer's Halls | | Dungeon = Hieromancer's Halls | ||
| Coordinates = | | Coordinates = 4.4S, 82.8W | ||
| Wiki Map File = | | Wiki Map File = | ||
| ACmaps ID = 02A9 | | ACmaps ID = 02A9 | ||
}} | }} | ||
}} | }} | ||
== | == Rewards == | ||
{{Rewards Table | |||
| Quest Task = Add ''one'' Kindling Stone to each Unkindled Thaumaturgic armor piece | |||
| Item Reward = | |||
Thaumaturgic Armor (Trained War Magic req.) | |||
* {{Itemlink|Thaumaturgic Plate Coat|Mode=icon}} | |||
* {{Itemlink|Thaumaturgic Plate Girth|Mode=icon}} | |||
* {{Itemlink|Thaumaturgic Plate Leggings|Mode=icon}} | |||
| Max XP Reward = | Percent of Level = | Level Cap = | |||
| Repeat Max XP Reward = | Repeat Percent of Level = | Repeat Level Cap = | |||
| Luminance Reward = | |||
| Title Reward = | |||
| Other Reward = | |||
}} | |||
{{ | {{Rewards Table | ||
| | | Quest Task = Add ''two'' Kindling Stones to each Unkindled Thaumaturgic armor piece | ||
| | | Item Reward = | ||
Exarch Armor (Specialised War Magic req.) | |||
| | * {{Itemlink|Exarch Plate Coat|Mode=icon}} | ||
| | * {{Itemlink|Exarch Plate Girth|Mode=icon}} | ||
| | * {{Itemlink|Exarch Plate Leggings|Mode=icon}} | ||
| | | Max XP Reward = | Percent of Level = | Level Cap = | ||
| | | Repeat Max XP Reward = | Repeat Percent of Level = | Repeat Level Cap = | ||
| | | Luminance Reward = | ||
| | | Title Reward = | ||
| Other Reward = | |||
| | |||
| | |||
| | |||
| | |||
| | |||
| | |||
| | |||
| | |||
}} | }} | ||
{{ | {{Rewards Table | ||
| | | Quest Task = Side rewards | ||
| Globe of Auberean | | Item Reward = | ||
| Lightweight Tome | * {{Itemlink|Globe of Auberean|Mode=icon}} | ||
| Sasalia's Dress | * {{Itemlink|Lightweight Tome|Mode=icon}} | ||
| Boots of the Vault | * {{Itemlink|Sasalia's Dress|Mode=icon}} | ||
| | * {{Itemlink|Boots of the Vault|Mode=icon}} | ||
| | * {{Itemlink|Hieromancer's Orb|Mode=icon}} | ||
| | | Max XP Reward = | Percent of Level = | Level Cap = | ||
| | | Repeat Max XP Reward = | Repeat Percent of Level = | Repeat Level Cap = | ||
| | | Luminance Reward = | ||
| | | Title Reward = | ||
| | | Other Reward = | ||
}} | }} | ||
== Images == | == Images == | ||
Click image for full size version. | |||
<gallery> | |||
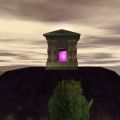
File:Strange Humming Crystal Live.jpg|Strange Humming Crystal | |||
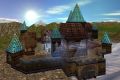
File:Hieromancers' Halls Live.jpg|Hieromancers' Halls | |||
| | File:Lyceum Live.jpg|Ishilai Lyceum | ||
File:Eaushi the Trainer Live.jpg|Eaushi the Trainer | |||
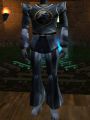
File:Thaumaturgic Plate Armor Live.jpg|Thaumaturgic Plate Armor, silver | |||
File:Thaumaturgic Plate Armor (Sea Grey) Live.jpg|Thaumaturgic Plate Armor, sea grey | |||
File:Thaumaturgic Plate Armor (Sea Blue) Live.jpg|Thaumaturgic Plate Armor, sea blue | |||
File:Exarch Plate Armor Live.jpg|Exarch Plate Armor, silver | |||
File:Exarch Plate Armor (Sea Grey) Live.jpg|Exarch Plate Armor, sea grey | |||
File:Exarch Plate Armor (Sea Blue) Live.jpg|Exarch Plate Armor, sea blue | |||
File:Blue Orb Live.jpg|Blue Orb | |||
File:Globe of Auberean Live.jpg|Globe of Auberean | |||
File:Sasalia's Dress Live.jpg|Sasalia's Dress | |||
File:Boots of the Vault Live.jpg|Boots of the Vault | |||
</gallery> | |||
== Dialog == | |||
{{Dialog| | |||
;Eaushi the Trainer | |||
|The golem stirs to life at your touch. "Kiya auranil..." it grumbles, then pauses | |||
|In your mind, a mild voice says, "Good day. It has been many turns of the stars since this servant has greeted visitors. Welcome to the Ishelai Lyceum, serving in good faith His Most Serene Majesty Kellin II. | |||
|"If you are a student, the written permission of the caloyer is required for me to send you to the trials. | |||
;Handing in Slip of Paper | |||
|You give Eaushi the Trainer Slip of Paper | |||
|Eaushi the Trainer tells you, "This note appears to be valid... although the date seems to be... a bit off. This golem shall now teleport you to one of the five trial grounds. May light fall upon your shoulders, young apprentice. | |||
|{{Magic|Eaushi the Trainer teleports you with Portal Sending.}} | |||
;Opening the First Threshold, Lyceum Training Grounds | |||
|The door swings wide, and a melodious voice in your mind says, "Beyond lays the first and easiest test. Once you jump into the abyss, you may not return this way. You must enter the test grounds again later." | |||
;Opening the Second Threshold, Lyceum Training Grounds | |||
|The door swings wide, and a melodious voice in your mind says, "Beyond lays the second test, more difficult than the previous. Once you jump into the abyss, you may not return this way. You must enter the test grounds again later." | |||
;Opening the Third Threshold, Lyceum Training Grounds | |||
|The door swings wide, and a melodious voice in your mind says, "Beyond lays the last and most grueling test. Once you jump into the abyss, you may not return this way. You must enter the test grounds again later." | |||
;Handing in Small Pale Crystal | |||
|You give Eaushi the Trainer Small Pale Crystal | |||
|Eaushi the Trainer tells you, "Well done, young master! You have defeated the first Nephol Golem. This is the first step on your path to becoming a Thaumaturge of the Order. | |||
|Eaushi the Trainer gives you Unkindled Thaumaturgic Plate Girth | |||
|Eaushi the Trainer tells you, "You must still Enkindle this girth before it may be worn. | |||
;Handing in Pale Crystal | |||
|You give Eaushi the Trainer Pale Crystal | |||
|Eaushi the Trainer tells you, "Splendid, young master! You have defeated the second Nephol Golem. Only one remains before you may be eligible to become a Thaumaturge of the Order. | |||
|Eaushi the Trainer gives you Unkindled Thaumaturgic Plate Leggings | |||
|Eaushi the Trainer tells you, "You must still Enkindle these leggings before they may be worn." | |||
;Handing in Large Pale Crystal | |||
|You give Eaushi the Trainer Large Pale Crystal | |||
|Eaushi the Trainer tells you, "Exceptional, young master! You have defeated the final Nephol Golem. You are now eligible to become a Thaumaturge of the Order. | |||
|Eaushi the Trainer gives you Unkindled Thaumaturgic Plate Coat | |||
|Eaushi the Trainer tells you, "You must still Enkindle this coat before it may be worn, and the skill required to add the Kindling Stones to your personal battle armor is your final test before becoming a full Hieromancer. | |||
;Kindling armor, first attempt (success) | |||
|With a burst of warmth and heat, the Kindling Stone fuses itself into the [coat/girth/leggings]. This piece of [color] colored Thaumaturgic Plate may now be worn! | |||
;Kindling armor, first attempt (failure) | |||
|Your war magic skill is insufficient to kindle this piece of armor. Your Kindling Stone breaks! | |||
;Kindling armor, second attempt (success) | |||
|With a burst of warmth and heat, the Kindling Stone fuses itself into your Thaumaturgic [Coat/Girth/Leggings]. You have created a piece of Exarch Plate! | |||
;Kindling armor, second attempt (failure) | |||
|Your war magic skill is insufficient to apply a second Kindling Stone. The armor reverts to its unkindled state, and the Stone breaks. | |||
;Handing in Blue Orb | |||
|You give Eaushi the Trainer Blue Orb | |||
|Eaushi the Trainer tells you, "Ah. This bauble was created by the Imperial Talespinner Mistral Tersicor. For many years he wandered the world, recording the stories of all its' people. | |||
|Eaushi the Trainer tells you, "He disappeared from the palace at Tentael one cold night, just after Caerlin II had taken the throne. He left a note, saying that the songs of other worlds needed to be written, and that he would return in 2300 years. | |||
|Eaushi prods the orb gently. It blossoms, the blue surfaces spiraling open to reveal patches of green, brown, and white | |||
|Eaushi the Trainer gives you Globe of Auberean | |||
|The ceaseless mountain winds whistle around Eaushi's facets | |||
;Globe of Auberean interaction | |||
|You give Eaushi the Trainer Globe of Auberean. | |||
|Eaushi the Trainer tells you, "Beautiful, is it not?" | |||
|Eaushi the Trainer gives you Globe of Auberean. | |||
;Handing in Sunstone Geode | |||
|You give Eaushi the Trainer Sunstone Geode | |||
|Eaushi the Trainer tells you, "It is rare to gain such a prize from the Nephol Golems, young master. This geode is said to indicate much favor. Perhaps you were born under Irihane ascendant? | |||
|Eaushi the Trainer tells you, "No... This golem does not feel the influence of any lights it knows upon you. How odd." | |||
;Boots of the Vault interaction | |||
|You give Eaushi the Trainer Boots of the Vault. | |||
|Eaushi the Trainer tells you, "These bring back memories. These boots were the property of Marr Areleo, one of the Exarchs of the Order." | |||
|Eaushi the Trainer tells you, "He and his brother were responsible for patrolling certain... storehouses, ensuring they remained safely under lock and key." | |||
|Eaushi the Trainer gives you Boots of the Vault. | |||
|Eaushi the Trainer tells you, "This task was given to them by Caerlin I, at the behest of the mage Asheron." | |||
[[ | ;Opening Trunk | ||
|As the trunk is opened, a whisper of exotic scent rises from its rotting form. The ghosts of long-decayed spices leave you with an impression of warmth, hearth, and home. | |||
;Sasalia's Dress interaction | |||
|You give Eaushi the Trainer Sasalia's Dress. | |||
|Eaushi the Trainer tells you, "This was once worn by the mage Sasalia, who became one of our instructors. In addition to the combat arts, Sasalia was also a master of culinary magic." | |||
|Eaushi the Trainer tells you, "An unusual combination for a Hieromancer. She often cooked for the students." | |||
|Eaushi the Trainer gives you Sasalia's Dress. | |||
|Eaushi the Trainer tells you, "She had a rather peculiar pet, too. When she was a girl attending this school, it would sit on her head during classes." | |||
;Lightweight Tome interaction | |||
|You give Eaushi the Trainer Lightweight Tome. | |||
|Eaushi the Trainer tells you, "This book was crafted by Rurinah, a member of the last class of students here. She was quite skilled in the art of parchment-making." | |||
|Eaushi the Trainer tells you, "The process had been passed through her family for generations. She was proud to note that her grandmother had made paper for the esteemed Maila of Knorr." | |||
|Eaushi the Trainer gives you Lightweight Tome. | |||
|Eaushi the Trainer tells you, "This servant recalls her well - a terribly serious silver-haired girl, given to calling more lighthearted people 'fools.'" | |||
;Permission Slip interaction | |||
|You give Eaushi the Trainer Permission Slip. | |||
|Eaushi the Trainer tells you, "This golem fears it does not recognize these letters, young master. It humbly apologizes. This golem was granted the capacity to impress its words upon the softly glowing mind, but not to read languages other than its own." | |||
|Eaushi the Trainer gives you Permission Slip. | |||
}} | |||
== Update History == | |||
{{Update History| | |||
[[Lonely in the World]] | |||
* Quest introduced. | |||
[[The Quest for Freedom]] | |||
* Repeat timer changed from 27 days to 20 hours. | |||
}} | |||
Latest revision as of 09:43, 12 October 2020
| Walkthrough & Notes Dungeons & Maps Rewards Images Dialog Update History |
| Hieromancer's Armor | |
|---|---|
| Level: | Any |
| Type: | Solo |
| Starts With: | Zairente Ra-Yao |
| Starts At: | Linvak Mountains (random spawn) |
| Repeat: | 20 Hours |
Overview
- The armor from this quest may be further upgraded via the Halls of Knorr quest.
- This quest requires some lever pulling, but the doors stay open long enough for a single person to complete it.
Walkthrough & Notes
Part 1: Obtain Supplies
- Locate the randomly appearing wilderness vendors, or obtain their items from other players.
- Zairente Ra-Yao - Sells Peculiar Old Dagger, a required item.
- Optional: Hasina bint Rira - Sells Puzzle Box. Used to obtain the Decoded Untranslated Text.
- Optional: Spertat the Ursuin Hunter - Sells Unreadable Text. Used to obtain the Decoded Untranslated Text.
- Obtain a Vial of Organic Acid, a low drop rate trophy from various Grievvers, including Virulent Grievvers, Venomous Grievvers, Bile Grievvers, Bane Grievvers and Harrower Grievvers
- Note: The Cave of the Escaped Thief at 71.1N, 50.2W (landscape, no level requirement) from the Sword of Bellenesse quest is ideal for quickly hunting down a Vial of Organic Acid, as it is populated by numerous high-level Grievvers on a quick spawn.
- Use the acid on the dagger to obtain the Glittering Crystalline Key.
- Locate a Humming Crystal Portal, which spawns randomly in certain wilderness areas like the Direlands and Linvak Mountain Range. The portal is tiable, though not summonable, so if you chance across it before you have the acid or dagger you can save the tie.
- At the Humming Crystal, use the Glittering Crystalline Key on the Strange Humming Crystal to obtain the Lyceum Recall Gem.
The following steps can be done in either order, and there are advantages to each.
- Advantages of going to the Hieromancer Halls first:
- If you are already at the Humming Crystal, the exit portals will bring you very close to the Halls.
- If you want the Globe of Auberean, made from the Blue Orb, you must obtain the blue orb in the Halls before heading to the Lyceum.
- Advantage of going to the Lyceum first:
- If you want to experiment with the color of your armor, or are unsure of your success rate, it is better to obtain the unkindled armor first and then go to the Halls, where you can pick up as many kindling stones as you need.
Part 2: Hieromancer's Halls
- While still at the Humming Crystal, tie to or use the Exit Portal. It drops close to the Hieromancers' Halls
- Enter the Halls. Follow the map to reach the Silver Kindling Stone, Sea Blue Kindling Stone and Sea Grey Kindling Stone.
- Obtain the Kindling stones you need. It takes about 25 seconds for the stone to respawn. Color is purely for style and has no effect on the stats or spells on the finished armor. If you want Thaumaturgic Plate Armor - armor for trained War Magic - you need 1 stone per piece of armor. If you want Exarch Plate Armor - armor for specialized War Magic - you need 2 stones per piece of armor.
- Optional: After obtaining your kindling stones, head deeper in to obtain the Blue Orb.
Part 3: Ishilai Lyceum
- Use the Lyceum Recall Gem to send yourself to the Ishilai Lyceum.
- Take the Slip of Paper and present it to Eaushi the Trainer. It will teleport you into the Lyceum Training Grounds.
- Take the west hallway for the easiest difficulty test. Kill the Tenuous Nephol Golem and loot the Small Pale Crystal. You may have to kill several golems before obtaining a crystal. Take the exit portal.
- Re-enter the Training Grounds. Take the north hallway for the middle difficulty test. Kill the Diaphanous Nephol Golem and loot the Pale Crystal. You may have to kill several golems before obtaining a crystal. Take the exit portal.
- Re-enter the Training Grounds. Take the east hallway for the hardest difficulty test. Kill the Turbid Nephol Golem and loot the Large Pale Crystal. You may have to kill several golems before obtaining a crystal. Take the exit portal.
- Present the three crystals to Eaushi the Trainer to receive Unkindled Thaumaturgic Plate Coat, Unkindled Thaumaturgic Plate Girth and Unkindled Thaumaturgic Plate Leggings.
- Optional: While at the Lyceum, complete any of the following tasks.
- Kill a Guardian Golem. Loot the Trunk Key from its corpse. Unlock the Trunk to obtain Sasalia's Dress.
- Head out of the castle and to the upper building and obtain the Lightweight Tome, found in the basement library.
- If you obtained a Blue Orb in the Hieromancer's Halls, give it to Eaushi the Trainer to obtain the Globe of Auberean.
- Enter the Lyceum Training Grounds. Kill the golems until one drops a Sunstone Geode. Give it to Eaushi the Trainer to obtain the Hieromancer's Orb.
- Enter the Lyceum Training Grounds. With Lockpick, unlock the 350 resistance chest and loot A Boot and Another Boot. Combine to create the Boots of the Vault.
- While at the Lyceum, present Eaushi the Trainer with the various items from this quest. The golem often gives a response.
Part 4: Kindling
- Add one kindling stone to each piece of armor to create Thaumaturgic Plate Armor - armor for trained War Magic.
- Add a second kindling stone to each piece of armor to create Exarch Plate Armor - armor for specialized War Magic.
- Failing any step reverts the piece to the unkindled state.
- Skill increases chances of applying the kindling stone, but there is no hard cap. It is recommended that you apply the kindling stones in the Heiromancer's Hall if you are lower level to have unlimited chances.
- Adding a third stone to a piece of Exarch Plate Armor reverts it to the unkindled state, allowing for the color to be changed.
Dungeons & Maps
| Dungeon | Coordinates | Wiki Map | ACmaps |
|---|---|---|---|
| Lyceum Training Grounds | From Ishilai Lyceum | -- | 0112 |
| Hieromancer's Halls | 4.4S, 82.8W | -- | 02A9 |
Rewards
| Add one Kindling Stone to each Unkindled Thaumaturgic armor piece | |
|---|---|
| Items: | |
|
Thaumaturgic Armor (Trained War Magic req.) | |
| Add two Kindling Stones to each Unkindled Thaumaturgic armor piece | |
|---|---|
| Items: | |
|
Exarch Armor (Specialised War Magic req.) | |
| Side rewards | |
|---|---|
| Items: | |
Images
Click image for full size version.
-

Strange Humming Crystal
-
Hieromancers' Halls
-
Ishilai Lyceum
-
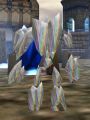
Eaushi the Trainer
-

Thaumaturgic Plate Armor, silver
-
Thaumaturgic Plate Armor, sea grey
-
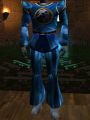
Thaumaturgic Plate Armor, sea blue
-
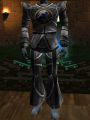
Exarch Plate Armor, silver
-

Exarch Plate Armor, sea grey
-
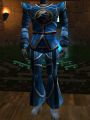
Exarch Plate Armor, sea blue
-
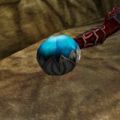
Blue Orb
-

Globe of Auberean
-
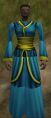
Sasalia's Dress
-
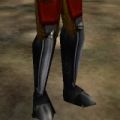
Boots of the Vault


_Live.jpg)
_Live.jpg)

_Live.jpg)
_Live.jpg)


Dialog
- Eaushi the Trainer
- The golem stirs to life at your touch. "Kiya auranil..." it grumbles, then pauses
- In your mind, a mild voice says, "Good day. It has been many turns of the stars since this servant has greeted visitors. Welcome to the Ishelai Lyceum, serving in good faith His Most Serene Majesty Kellin II.
- "If you are a student, the written permission of the caloyer is required for me to send you to the trials.
- Handing in Slip of Paper
- You give Eaushi the Trainer Slip of Paper
- Eaushi the Trainer tells you, "This note appears to be valid... although the date seems to be... a bit off. This golem shall now teleport you to one of the five trial grounds. May light fall upon your shoulders, young apprentice.
- Eaushi the Trainer teleports you with Portal Sending.
- Opening the First Threshold, Lyceum Training Grounds
- The door swings wide, and a melodious voice in your mind says, "Beyond lays the first and easiest test. Once you jump into the abyss, you may not return this way. You must enter the test grounds again later."
- Opening the Second Threshold, Lyceum Training Grounds
- The door swings wide, and a melodious voice in your mind says, "Beyond lays the second test, more difficult than the previous. Once you jump into the abyss, you may not return this way. You must enter the test grounds again later."
- Opening the Third Threshold, Lyceum Training Grounds
- The door swings wide, and a melodious voice in your mind says, "Beyond lays the last and most grueling test. Once you jump into the abyss, you may not return this way. You must enter the test grounds again later."
- Handing in Small Pale Crystal
- You give Eaushi the Trainer Small Pale Crystal
- Eaushi the Trainer tells you, "Well done, young master! You have defeated the first Nephol Golem. This is the first step on your path to becoming a Thaumaturge of the Order.
- Eaushi the Trainer gives you Unkindled Thaumaturgic Plate Girth
- Eaushi the Trainer tells you, "You must still Enkindle this girth before it may be worn.
- Handing in Pale Crystal
- You give Eaushi the Trainer Pale Crystal
- Eaushi the Trainer tells you, "Splendid, young master! You have defeated the second Nephol Golem. Only one remains before you may be eligible to become a Thaumaturge of the Order.
- Eaushi the Trainer gives you Unkindled Thaumaturgic Plate Leggings
- Eaushi the Trainer tells you, "You must still Enkindle these leggings before they may be worn."
- Handing in Large Pale Crystal
- You give Eaushi the Trainer Large Pale Crystal
- Eaushi the Trainer tells you, "Exceptional, young master! You have defeated the final Nephol Golem. You are now eligible to become a Thaumaturge of the Order.
- Eaushi the Trainer gives you Unkindled Thaumaturgic Plate Coat
- Eaushi the Trainer tells you, "You must still Enkindle this coat before it may be worn, and the skill required to add the Kindling Stones to your personal battle armor is your final test before becoming a full Hieromancer.
- Kindling armor, first attempt (success)
- With a burst of warmth and heat, the Kindling Stone fuses itself into the [coat/girth/leggings]. This piece of [color] colored Thaumaturgic Plate may now be worn!
- Kindling armor, first attempt (failure)
- Your war magic skill is insufficient to kindle this piece of armor. Your Kindling Stone breaks!
- Kindling armor, second attempt (success)
- With a burst of warmth and heat, the Kindling Stone fuses itself into your Thaumaturgic [Coat/Girth/Leggings]. You have created a piece of Exarch Plate!
- Kindling armor, second attempt (failure)
- Your war magic skill is insufficient to apply a second Kindling Stone. The armor reverts to its unkindled state, and the Stone breaks.
- Handing in Blue Orb
- You give Eaushi the Trainer Blue Orb
- Eaushi the Trainer tells you, "Ah. This bauble was created by the Imperial Talespinner Mistral Tersicor. For many years he wandered the world, recording the stories of all its' people.
- Eaushi the Trainer tells you, "He disappeared from the palace at Tentael one cold night, just after Caerlin II had taken the throne. He left a note, saying that the songs of other worlds needed to be written, and that he would return in 2300 years.
- Eaushi prods the orb gently. It blossoms, the blue surfaces spiraling open to reveal patches of green, brown, and white
- Eaushi the Trainer gives you Globe of Auberean
- The ceaseless mountain winds whistle around Eaushi's facets
- Globe of Auberean interaction
- You give Eaushi the Trainer Globe of Auberean.
- Eaushi the Trainer tells you, "Beautiful, is it not?"
- Eaushi the Trainer gives you Globe of Auberean.
- Handing in Sunstone Geode
- You give Eaushi the Trainer Sunstone Geode
- Eaushi the Trainer tells you, "It is rare to gain such a prize from the Nephol Golems, young master. This geode is said to indicate much favor. Perhaps you were born under Irihane ascendant?
- Eaushi the Trainer tells you, "No... This golem does not feel the influence of any lights it knows upon you. How odd."
- Boots of the Vault interaction
- You give Eaushi the Trainer Boots of the Vault.
- Eaushi the Trainer tells you, "These bring back memories. These boots were the property of Marr Areleo, one of the Exarchs of the Order."
- Eaushi the Trainer tells you, "He and his brother were responsible for patrolling certain... storehouses, ensuring they remained safely under lock and key."
- Eaushi the Trainer gives you Boots of the Vault.
- Eaushi the Trainer tells you, "This task was given to them by Caerlin I, at the behest of the mage Asheron."
- Opening Trunk
- As the trunk is opened, a whisper of exotic scent rises from its rotting form. The ghosts of long-decayed spices leave you with an impression of warmth, hearth, and home.
- Sasalia's Dress interaction
- You give Eaushi the Trainer Sasalia's Dress.
- Eaushi the Trainer tells you, "This was once worn by the mage Sasalia, who became one of our instructors. In addition to the combat arts, Sasalia was also a master of culinary magic."
- Eaushi the Trainer tells you, "An unusual combination for a Hieromancer. She often cooked for the students."
- Eaushi the Trainer gives you Sasalia's Dress.
- Eaushi the Trainer tells you, "She had a rather peculiar pet, too. When she was a girl attending this school, it would sit on her head during classes."
- Lightweight Tome interaction
- You give Eaushi the Trainer Lightweight Tome.
- Eaushi the Trainer tells you, "This book was crafted by Rurinah, a member of the last class of students here. She was quite skilled in the art of parchment-making."
- Eaushi the Trainer tells you, "The process had been passed through her family for generations. She was proud to note that her grandmother had made paper for the esteemed Maila of Knorr."
- Eaushi the Trainer gives you Lightweight Tome.
- Eaushi the Trainer tells you, "This servant recalls her well - a terribly serious silver-haired girl, given to calling more lighthearted people 'fools.'"
- Permission Slip interaction
- You give Eaushi the Trainer Permission Slip.
- Eaushi the Trainer tells you, "This golem fears it does not recognize these letters, young master. It humbly apologizes. This golem was granted the capacity to impress its words upon the softly glowing mind, but not to read languages other than its own."
- Eaushi the Trainer gives you Permission Slip.
Update History
|