Overlord's Sword Quest: Difference between revisions
From Drunkapedia
imported>Tlosk m (Text replace - " | Max XP Reward = " to " | Luminance Reward = | Max XP Reward = ") |
imported>Arkalor No edit summary |
||
| (19 intermediate revisions by 5 users not shown) | |||
| Line 1: | Line 1: | ||
{{Quest Summary | {{Quest Summary | ||
| | | Level = 20 | ||
| | | Recommended Level = | ||
| Quest Type = Solo | |||
| Starts With = Tumerok Priest | |||
| Starts At = 8.1S, 74.5E in [[Dryreach]] | |||
| Route = | |||
| Quest Type = Solo | | Repeat Timer = 20 Hours | ||
| | | Time to Complete = | ||
| | | Contracts = | ||
| | |||
| | |||
| | |||
| | |||
}} | }} | ||
== | == Overview == | ||
Help the people of Dryreach by working your way up the ranks of the Tumerok army all the way to the Overlord himself. | Help the people of [[Dryreach]] by working your way up the ranks of the Tumerok army all the way to the Overlord himself. | ||
* There is a {{Itemlink|Tumerok Fortress Rumor|rumor}} for this quest. | |||
* The most time consuming part of this quest is aquiring all of the various keys. This can be skipped entirely, and the players can advance to the final dungeon, if there is a skilled Lockpick in the group (700 resistance is the final door), if you have 2+ fellowship members and you can PKL through the door, or you can tie to the portal from outside of the fortress. This will save you atleast an hour. You can also have someone with buffed jump skill of 430+ jump over the fortress wall and open the door from the inside. | |||
=== | == Walkthrough & Notes == | ||
=== Priest's Key === | |||
# As you come to the portal at 8.1S, 74.5E in [[Dryreach]], you will meet a group of Tumeroks - kill the [[Tumerok Priest]] and loot the {{Itemlink|Tumerok Priest's Key}}. | |||
# | === Gladiator's Key === | ||
# | # Enter the swamps portal and run to fort at [[40.0S, 54.9W - Tumerok Stronghold|40.0S, 54.9W]] as inscribed on the key. | ||
# Enter the fort without the towers using the Priest's key and loot the {{Itemlink|Tumerok Gladiator's Key}} from the [[Tumerok Gladiator]]. | |||
=== | === Major's Key === | ||
# | # The key is inscribed with the nearby coordinates of [[42.0S, 56.2W - Tumerok Fort|42.0S, 56.2W]] - run there for the next key. | ||
# | # Use the Tumerok Gladiator's key to unlock the door to the fort. | ||
# Defeat Tumerok Majors until you find the {{Itemlink|Tumerok Major's Key}}. | |||
=== | === Taskmaster's Key === | ||
# For the next key, head to [[Fort Tethana]]. | |||
#* Route| From the [[Town Network]], take the Aluvian wing (north) to Fort Teth. | |||
# Run to the [[Tumerok Mine]] at 7.9N, 61.3W. | |||
# From the drop, turn right and make your first left into a large open room. | |||
# For the next key, head to [[Fort Tethana]] | |||
# Run to the [[Tumerok Mine]] at 7.9N, 61.3W | |||
# From the drop, turn right | |||
# Head west and head down the ramp. Hug the right wall along the hallway. | # Head west and head down the ramp. Hug the right wall along the hallway. | ||
# You'll come to a locked door (resistance 425), use the | # You'll come to a locked door (resistance 425), use the Tumerok Major's Key to open it. | ||
# Kill Taskmasters in the room until you find the {{Itemlink|Tumerok Taskmaster's Key}}. | |||
=== Augmented Tumerok's Key === | === Augmented Tumerok's Key === | ||
# For the next key you will need to return to [[Dryreach]] and take the East Dires portal once more. | # For the next key you will need to return to [[Dryreach]] and take the East Dires portal once more. | ||
# From there, run to the next fort located at | # From there, run to the next fort located at [[34.2S, 49.8W - Tumerok Fort|34.2S, 49.8W]]. | ||
# Enter the fort using the Taskmaster's Key and kill the [[Augmented Tumerok]]s until you find the | # Enter the fort using the Tumerok Taskmaster's Key and kill the [[Augmented Tumerok]]s until you find the {{Itemlink|Augmented Tumerok's Key}}. | ||
=== Heavy Tumerok | === Heavy Tumerok Key === | ||
# From [[Ayan Baqur]] or using [[Mount Lethe Recall]] run to | # From [[Ayan Baqur]], or using [[Mount Lethe Recall]], run to the [[Cave (Ayan Baqur)|cave]] dungeon portal at 47.8S, 83.7W. | ||
# From the entrance hug the left wall ignoring the side rooms until you reach a ramp up. | # From the entrance hug the left wall ignoring the side rooms until you reach a ramp up. | ||
# Keep to the left until you go through a room and then take the ramp up. Take the first left, then up once again. | # Keep to the left until you go through a room and then take the ramp up. Take the first left, then up once again. | ||
# Follow the corridor until you reach a T junction. Make a right to the locked door (resistance 550). | # Follow the corridor until you reach a T junction. Make a right to the locked door (resistance 550). | ||
# Use the | # Use the Augmented Tumerok's Key to open it. In the room you will find two chests. | ||
# The {{Itemlink|Heavy Tumerok Key}} is inside one of the chests. | |||
=== High Priest's Key === | === High Priest's Key === | ||
# The final [[51.1S, 82.0W - Tumerok Fort| | # The final fort is a short way from the Cave at [[51.1S, 82.0W - Tumerok Fort|51.1S, 82.0W]]. | ||
# Use the | # Use the Heavy Tumerok Key to open the door (resistance 600). | ||
# The | # The {{Itemlink|High Priest's Key}} is found on a High Priest at the top of the north east towers. | ||
=== Gilded Tumerok Key === | === Gilded Tumerok Key === | ||
# Return to [[Fort Teth]] and run to the [[Tumerok Fortress]] at 12.3N, 73.7W. | # Return to [[Fort Teth]] and run to the [[Tumerok Fortress]] at 12.3N, 73.7W. | ||
# Use the | # Use the High Priest's Key to open the door (resistance 650). | ||
# Make your way to the northeast tower. The entrance portal is up top (restricted to levels 20+). | # Make your way to the northeast tower. The entrance portal is up top (restricted to levels 20+). | ||
# From the entrance, take the passage around to the southeast until you reach some stairs. | # From the entrance, take the passage around to the southeast until you reach some stairs. | ||
| Line 87: | Line 67: | ||
# Inside is an altar guarded by Tumeroks. From this room take the passage to the north and go through two doors. | # Inside is an altar guarded by Tumeroks. From this room take the passage to the north and go through two doors. | ||
# At the T junction take the right passage heading south and down a ramp. At the bottom of the ramp make a left into a small room. | # At the T junction take the right passage heading south and down a ramp. At the bottom of the ramp make a left into a small room. | ||
# You'll find 6 chests guarded by [[Wasteland Rat]]s. One of the chests holds the | # You'll find 6 chests guarded by [[Wasteland Rat]]s. One of the chests holds the {{Itemlink|Gilded Tumerok Key}}. | ||
=== Defeating the Tumerok Overlord | === Defeating the Tumerok Overlord === | ||
# Head back to the altar room and look for the blue crystal on the south wall, behind the crystal is a secret passage. | # Head back to the altar room and look for the blue crystal on the south wall, behind the crystal is a secret passage. | ||
# Follow the ramps down and around to the final locked door (resistance 700). Use the | # Follow the ramps down and around to the final locked door (resistance 700). Use the Gilded Tumerok Key to open it. | ||
# Follow the corridor to a room with [[Virindi Preceptor]]s and blue crystals. | # Follow the corridor to a room with [[Virindi Preceptor]]s and blue crystals. | ||
# Take the corridor to the north and enter the Overlord's lair | # Take the corridor to the north and enter the Overlord's lair | ||
# Kill the [[Tumerok Overlord]] and take his | # Kill the [[Tumerok Overlord]] and take his {{Itemlink|Overlord's Sword}} and {{Itemlink|Overlord's Key}}. The key opens [[The Overlord's Chest]] in the middle of the room. | ||
# The chest contains various low tier loot and the | # The chest contains various low tier loot and the {{Itemlink|Mark of the Overlord}}, which can be handed to [[Lieutenant Rothe]] in Dryreach for experience. | ||
== Maps == | == Dungeons & Maps == | ||
{{Dungeon Table | {{Dungeon Table | ||
| Table Rows = | | Table Rows = | ||
| Line 105: | Line 85: | ||
| Wiki Map File = | | Wiki Map File = | ||
| ACmaps ID = 01C1 | | ACmaps ID = 01C1 | ||
}} | }} | ||
{{Dungeon Maps | {{Dungeon Maps | ||
| Dungeon = | | Dungeon = Cave (Ayan Baqur){{!}}Cave | ||
| Coordinates = 47.8S, 83.6W | | Coordinates = 47.8S, 83.6W | ||
| Wiki Map File = | | Wiki Map File = | ||
| ACmaps ID = 01BD | | ACmaps ID = 01BD | ||
}} | }} | ||
{{Dungeon Maps | {{Dungeon Maps | ||
| Line 121: | Line 97: | ||
| Wiki Map File = | | Wiki Map File = | ||
| ACmaps ID = 01BE | | ACmaps ID = 01BE | ||
}} | }} | ||
}} | }} | ||
{{ | == Rewards == | ||
| | {{Rewards Table | ||
| Quest Task = Loot [[The Overlord's Chest]] | |||
| | | Item Reward = | ||
* {{Icon Link|Overlord's Sword}} | |||
| | | Max XP Reward = | Percent of Level = | Level Cap = | ||
| | | Luminance Reward = | ||
| | | Title Reward = | ||
| | |||
| | |||
}} | }} | ||
{{Item | {{Rewards Table | ||
| | | Quest Task = Hand in [[Mark of the Overlord]] | ||
| Item Reward = | |||
| Max XP Reward = 18,000,000 | Percent of Level = 100 | Level Cap = 70 | |||
| Luminance Reward = | |||
| Title Reward = | |||
}} | }} | ||
== | == Images == | ||
<gallery widths=200px heights=200px perrow=3> | |||
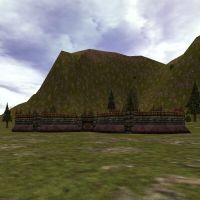
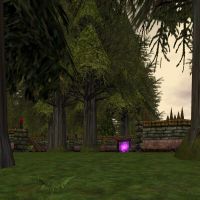
File:Overlord's Sword Quest Live.jpg|Area with the Tumerok Priest's Key | |||
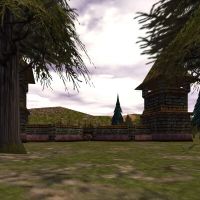
File:Overlord's Sword Quest 2 Live.jpg|Tumerok Gladiator's Fort | |||
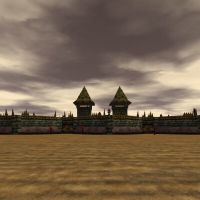
{{ | File:Overlord's Sword Quest 3 Live.jpg|Tumerok Major's Fort | ||
File:Tumerok Mine Live.jpg|Tumerok Mine | |||
File:Overlord's Sword Quest 4 Live.jpg|Augmented Tumerok's Fort | |||
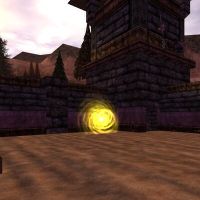
File:Overlord's Sword Quest 5 Live.jpg|Tumerok Cave | |||
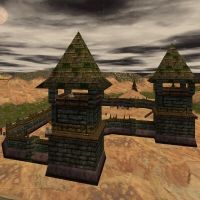
File:Overlord's Sword Quest 6 Live.jpg|High Priest's Fort | |||
File:Tumerok Fortress Live.jpg|Tumerok Fortress | |||
File:Overlord's Sword Quest 7 Live.jpg|The Overlord | |||
</gallery> | |||
== Dialog == | |||
{{Dialog| | |||
;Opening Dialog | |||
|Dinsmal the Beggar tells you, "It's said that tumeroks are crawling all over the Direlands. There's even supposed to be a big, hidden, underground fortress somewhere, where the biggest and most powerful tumeroks live." | |||
|Dinsmal the Beggar tells you, "Tumeroks have some basic building skills and have also taken over many Empyrean ruins in the Direlands, so you'll see numerous walled forts over there." | |||
|Dinsmal the Beggar tells you, "It's said that some of them are locked, so you might need to find the right key, or know someone who can pick the locks!" | |||
|Orcud the Beggar tells you, "Near the main tumerok camp, outside of town, is a portal into the Direlands. Supposedly there's a portal that comes back from the Direlands, too, but it's guarded by tumeroks on the other side." | |||
;Handing in Mark of the Overlord | |||
|You give Lieutenant Rothe Mark of the Overlord. | |||
|Lieutenant Rothe tells you, "Ahh the mark of the Overlord, you are a brave adventurer indeed. Let me reward your efforts." | |||
|You've earned 18,000,000 experience. | |||
}} | }} | ||
== | == Update History == | ||
{{Update History| | |||
[[Release]] | |||
* Quest introduced. | |||
[[Now In This Hush]] | |||
* Tumerok Overlord loot now found in a chest rather than on his corpse. | |||
* The overlord carries a key to the new chest. | |||
- | [[A Perfect Paradox]] | ||
* [[Overlord's Sword]] updated. | |||
* Quest forts and dungeons updated. | |||
* [[Tumerok Worker's Key]] replaced with the [[Tumerok Priest's Key]]. | |||
* [[Tumerok Officer's Key]] replaced with the [[Tumerok Major's Key]]. | |||
* [[High Tumerok's Key]] replaced with the [[Augmented Tumerok's Key]]. | |||
* [[Tumerok Gladiator's Key]] now found in the [[40.0S, 54.9W - Tumerok Stronghold|Tumerok Stronghold]] at 40.0S, 54.9W instead of the [[Tumerok Mine]]. | |||
* [[Tumerok Taskmaster's Key]] replaces the [[Tumerok Gladiator's Key]] at the [[Tumerok Mine]]. | |||
* Keys now have the coordinates of the next fort in their description. | |||
[[Reforging the Past]] | |||
* Mark of the Overlord added to overlord's chest. | |||
[[The Quest for Freedom]] | |||
* Quest timer for [[Overlord's Key]] changed from 6 days to 20 hours. | |||
* | * Quest timer for [[Mark of the Overlord]] changed from 13 days to 20 hours. | ||
}} | |||
Latest revision as of 05:49, 15 August 2015
| Walkthrough & Notes Dungeons & Maps Rewards Images Dialog Update History |
| Overlord's Sword Quest | |
|---|---|
| Level: | 20 |
| Type: | Solo |
| Starts With: | Tumerok Priest |
| Starts At: | 8.1S, 74.5E in Dryreach |
| Repeat: | 20 Hours |
Overview
Help the people of Dryreach by working your way up the ranks of the Tumerok army all the way to the Overlord himself.
- There is a rumor for this quest.
- The most time consuming part of this quest is aquiring all of the various keys. This can be skipped entirely, and the players can advance to the final dungeon, if there is a skilled Lockpick in the group (700 resistance is the final door), if you have 2+ fellowship members and you can PKL through the door, or you can tie to the portal from outside of the fortress. This will save you atleast an hour. You can also have someone with buffed jump skill of 430+ jump over the fortress wall and open the door from the inside.
Walkthrough & Notes
Priest's Key
- As you come to the portal at 8.1S, 74.5E in Dryreach, you will meet a group of Tumeroks - kill the Tumerok Priest and loot the Tumerok Priest's Key.
Gladiator's Key
- Enter the swamps portal and run to fort at 40.0S, 54.9W as inscribed on the key.
- Enter the fort without the towers using the Priest's key and loot the Tumerok Gladiator's Key from the Tumerok Gladiator.
Major's Key
- The key is inscribed with the nearby coordinates of 42.0S, 56.2W - run there for the next key.
- Use the Tumerok Gladiator's key to unlock the door to the fort.
- Defeat Tumerok Majors until you find the Tumerok Major's Key.
Taskmaster's Key
- For the next key, head to Fort Tethana.
- Route| From the Town Network, take the Aluvian wing (north) to Fort Teth.
- Run to the Tumerok Mine at 7.9N, 61.3W.
- From the drop, turn right and make your first left into a large open room.
- Head west and head down the ramp. Hug the right wall along the hallway.
- You'll come to a locked door (resistance 425), use the Tumerok Major's Key to open it.
- Kill Taskmasters in the room until you find the Tumerok Taskmaster's Key.
Augmented Tumerok's Key
- For the next key you will need to return to Dryreach and take the East Dires portal once more.
- From there, run to the next fort located at 34.2S, 49.8W.
- Enter the fort using the Tumerok Taskmaster's Key and kill the Augmented Tumeroks until you find the Augmented Tumerok's Key.
Heavy Tumerok Key
- From Ayan Baqur, or using Mount Lethe Recall, run to the cave dungeon portal at 47.8S, 83.7W.
- From the entrance hug the left wall ignoring the side rooms until you reach a ramp up.
- Keep to the left until you go through a room and then take the ramp up. Take the first left, then up once again.
- Follow the corridor until you reach a T junction. Make a right to the locked door (resistance 550).
- Use the Augmented Tumerok's Key to open it. In the room you will find two chests.
- The Heavy Tumerok Key is inside one of the chests.
High Priest's Key
- The final fort is a short way from the Cave at 51.1S, 82.0W.
- Use the Heavy Tumerok Key to open the door (resistance 600).
- The High Priest's Key is found on a High Priest at the top of the north east towers.
Gilded Tumerok Key
- Return to Fort Teth and run to the Tumerok Fortress at 12.3N, 73.7W.
- Use the High Priest's Key to open the door (resistance 650).
- Make your way to the northeast tower. The entrance portal is up top (restricted to levels 20+).
- From the entrance, take the passage around to the southeast until you reach some stairs.
- Take the stairs down to the lower level and you'll see two passages on the west wall.
- Take the one on your right, then hug the right wall until you reach a large open room.
- Exit the room on the the west side and go through the doors. Continue straight ahead through two more doors and take the ramp up. # You should now be at a locked door. A pressure plate on the floor to the north opens it.
- Inside is an altar guarded by Tumeroks. From this room take the passage to the north and go through two doors.
- At the T junction take the right passage heading south and down a ramp. At the bottom of the ramp make a left into a small room.
- You'll find 6 chests guarded by Wasteland Rats. One of the chests holds the Gilded Tumerok Key.
Defeating the Tumerok Overlord
- Head back to the altar room and look for the blue crystal on the south wall, behind the crystal is a secret passage.
- Follow the ramps down and around to the final locked door (resistance 700). Use the Gilded Tumerok Key to open it.
- Follow the corridor to a room with Virindi Preceptors and blue crystals.
- Take the corridor to the north and enter the Overlord's lair
- Kill the Tumerok Overlord and take his Overlord's Sword and Overlord's Key. The key opens The Overlord's Chest in the middle of the room.
- The chest contains various low tier loot and the Mark of the Overlord, which can be handed to Lieutenant Rothe in Dryreach for experience.
Dungeons & Maps
| Dungeon | Coordinates | Wiki Map | ACmaps |
|---|---|---|---|
| Tumerok Mine | 7.9N, 61.3W | -- | 01C1 |
| Cave | 47.8S, 83.6W | -- | 01BD |
| Tumerok Fortress | 12.3N, 73.7W | -- | 01BE |
Rewards
| Loot The Overlord's Chest | |
|---|---|
| Items: | |
| Hand in Mark of the Overlord | |
|---|---|
| Experience: | 18,000,000 (100% up to level 70) |
Images
-

Area with the Tumerok Priest's Key
-
Tumerok Gladiator's Fort
-
Tumerok Major's Fort
-
Tumerok Mine
-
Augmented Tumerok's Fort
-
Tumerok Cave
-
High Priest's Fort
-
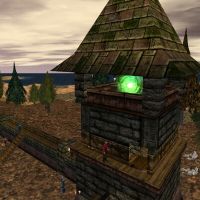
Tumerok Fortress
-
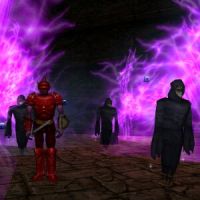
The Overlord


Dialog
- Opening Dialog
- Dinsmal the Beggar tells you, "It's said that tumeroks are crawling all over the Direlands. There's even supposed to be a big, hidden, underground fortress somewhere, where the biggest and most powerful tumeroks live."
- Dinsmal the Beggar tells you, "Tumeroks have some basic building skills and have also taken over many Empyrean ruins in the Direlands, so you'll see numerous walled forts over there."
- Dinsmal the Beggar tells you, "It's said that some of them are locked, so you might need to find the right key, or know someone who can pick the locks!"
- Orcud the Beggar tells you, "Near the main tumerok camp, outside of town, is a portal into the Direlands. Supposedly there's a portal that comes back from the Direlands, too, but it's guarded by tumeroks on the other side."
- Handing in Mark of the Overlord
- You give Lieutenant Rothe Mark of the Overlord.
- Lieutenant Rothe tells you, "Ahh the mark of the Overlord, you are a brave adventurer indeed. Let me reward your efforts."
- You've earned 18,000,000 experience.
Update History
|