Empyrean Rescue Dungeon: Difference between revisions
From Drunkapedia
imported>Sanddh m (→Creatures) |
imported>Arkalor's Bot m (template clean up) |
||
| (4 intermediate revisions by 2 users not shown) | |||
| Line 3: | Line 3: | ||
| Related Quests = [[Empyrean Rescue Quest]] | | Related Quests = [[Empyrean Rescue Quest]] | ||
| Updated = | | Updated = | ||
| Wiki Map File = F93B.png | | Wiki Map File = F93B.png | ||
| ACmaps.com ID = | | ACmaps.com ID = | ||
| Coordinates = 54.0S, 97.6E | | Coordinates = 54.0S, 97.6E | ||
| Landblock = F93B | | Landblock = F93B | ||
| Line 18: | Line 11: | ||
| Nearest LS = | | Nearest LS = | ||
| Route = Run north from the drop on [[Freebooter Isle]]. Open style entrance just past Bandit Boss dungeon. | | Route = Run north from the drop on [[Freebooter Isle]]. Open style entrance just past Bandit Boss dungeon. | ||
| Level Restrictions = 180 | |||
| Level Restrictions = 180 | | Tieable = | ||
| Tieable = | | Recallable = | ||
| Recallable = | | Summonable = | ||
| Summonable = | | Lifestone if Log = | ||
| Lifestone if Log = | |||
| Quest Flag = Speak to [[Emissary of Asheron (Cragstone)]] at 24.4N, 48.3E. | | Quest Flag = Speak to [[Emissary of Asheron (Cragstone)]] at 24.4N, 48.3E. | ||
}} | }} | ||
== | == Notes == | ||
== Maps == | == Maps == | ||
* Wiki Map (rough draft): | * Wiki Map (rough draft): | ||
:[[File:F93B.png]] | <div style="overflow:hidden">[[File:F93B.png|200px]]</div> | ||
== NPCs == | == NPCs == | ||
| Line 70: | Line 62: | ||
{{Creature Class|Virindi | {{Creature Class|Virindi | ||
| Location = Dungeon | | Location = Dungeon | ||
| Apostate | | Apostate Virindi Executor | ||
| Apostate Nexus Guardian | | Apostate Nexus Guardian | ||
| Apostate | | Apostate Virindi Inquisitor | ||
| Apostate Nexus Master | | Apostate Nexus Master | ||
}} | }} | ||
== Items and Objects == | == Items and Objects == | ||
{{ | * {{Itemlink|Dark Apostate Shard}} - Dropped by [[Apostate Nexus Master]] in Part 2. | ||
== Portals == | == Portals == | ||
| Line 88: | Line 80: | ||
<gallery heights=200px widths=200px perrow=3> | <gallery heights=200px widths=200px perrow=3> | ||
File:Engorged Bloodstone Vulned Live.jpg|[[Engorged Bloodstone]] | File:Engorged Bloodstone Vulned Live.jpg|[[Engorged Bloodstone]] | ||
File: | File:Empyrean Rescue Dungeon Live.jpg|Entrance to the Empyrean Rescue Dungeon | ||
</gallery> | </gallery> | ||
Latest revision as of 20:04, 7 December 2014
| Maps NPCs Creatures Items and Objects Portals Images Update History |
| Empyrean Rescue Dungeon | |
|---|---|
| Quests | Empyrean Rescue Quest |
| Restrictions | Level: 180 Quest Flagged Tieable: No Recallable: No Summonable: No |
| Coordinates | 54.0S, 97.6E |
| Nearest LS | ?? |
| Route | Run north from the drop on Freebooter Isle. Open style entrance just past Bandit Boss dungeon. |
| Map Files: | Wiki Map |
Show location on Dereth map
| |
| F93B | |


Notes
Maps
- Wiki Map (rough draft):

NPCs
- None
Creatures
Items and Objects
- Dark Apostate Shard - Dropped by Apostate Nexus Master in Part 2.
Portals
- Mysterious Portal - Connects Part 1 and 2.
- Sparkling Portal - Connects Part 2 to Part 3. Only active when red (cycles on every 10 minutes or so), you must have the Glowing Apostate Shard in your inventory to enter. The portal only remains active for 60 seconds, then goes inactive again (it only shows up on radar while active).
- Gateway - Connects Part 3 and 4.
- Surface Portals - There are various surface portals through the parts, usually by the drop but other places also. All are unrecallable/untiable and drop at various locations, including 54.0S 97.6E; 7.0S 74.9W.
Images
Click image for full size version.
-

-
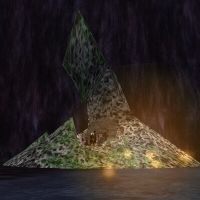
Entrance to the Empyrean Rescue Dungeon

