Sword of Lost Light Quest: Difference between revisions
imported>Arkalor (→Notes) |
imported>An Adventurer |
||
| (4 intermediate revisions by 2 users not shown) | |||
| Line 1: | Line 1: | ||
{{Quest Summary | {{Quest Summary | ||
| | | Level = Any | ||
| | | Recommended Level = 30+ | ||
| Quest Type = Solo | |||
| Starts With = | |||
| Starts At = [[Holtburg Dungeon]] at 43.6N, 33.0E | |||
| Quest Type = Solo | | Route = [[Holtburg]] | ||
| | | Repeat Timer = 20 Hours | ||
| | | Time to Complete = | ||
| | | Contracts = | ||
| | |||
| | |||
| | |||
}} | }} | ||
== | == Overview == | ||
After collecting seven keys inside different dungeons scattered across Dereth you can enter the Halls of Lost Light where the [[Guardian of the Lost Light]] wields the sword. The sword can be significantly upgraded via additional quests. | After collecting seven keys inside different dungeons scattered across Dereth you can enter the Halls of Lost Light where the [[Guardian of the Lost Light]] wields the sword. The sword can be significantly upgraded via additional quests. | ||
== | == Walkthrough & Notes == | ||
Only a single set of keys is required and can be collected beforehand. | Only a single set of keys is required and can be collected beforehand. | ||
=== Key #1: Worn Small Key (Holtburg) === | === Key #1: Worn Small Key (Holtburg) === | ||
# From [[Holtburg]], enter the [[Holtburg Dungeon]] at 43.6N, 33.0E | # From [[Holtburg]], enter the [[Holtburg Dungeon]] at 43.6N, 33.0E | ||
# From the drop, hug the left wall until you reach a down ramp. | # From the drop, hug the left wall until you reach a down ramp. | ||
# At the bottom of the ramp, enter the first room on your right and kill the [[Swamp Rat]]s inside. | # At the bottom of the ramp, enter the first room on your right and kill the [[Swamp Rat]]s inside. | ||
# Loot a | # Loot a {{Itemlink|Worn Small Key}} from the corpse of one of the rats. | ||
=== Key #2: Worn Strange Key (Yaraq) === | === Key #2: Worn Strange Key (Yaraq) === | ||
| Line 43: | Line 29: | ||
# At the bottom of the ramp, hug the wall right until you reach a 5-way intersection. Take the 2nd hall on the left. | # At the bottom of the ramp, hug the wall right until you reach a 5-way intersection. Take the 2nd hall on the left. | ||
# From here, head straight until you reach a dead end, where you'll find a few [[Drudge Slave]]s. | # From here, head straight until you reach a dead end, where you'll find a few [[Drudge Slave]]s. | ||
# Kill the slaves and loot the | # Kill the slaves and loot the {{Itemlink|Worn Strange Key}} from one of their corpses. | ||
=== Key #3: Worn Plain Key (Yanshi) === | === Key #3: Worn Plain Key (Yanshi) === | ||
# From [[Yanshi]], enter the [[Yanshi Tunnels]] at 12.2S, 45.5E, | # From [[Yanshi]], enter the [[Yanshi Tunnels]] at 12.2S, 45.5E, | ||
# From the drop, hug the left wall until you reach a diamond shaped room, with a locked gate to the North, and several [[Drudge Slave]]s. | # From the drop, hug the left wall until you reach a diamond shaped room, with a locked gate to the North, and several [[Drudge Slave]]s. | ||
# Kill the [[Drudge Slave]]s and loot the | # Kill the [[Drudge Slave]]s and loot the {{Itemlink|Worn Plain Key}} from one of their corpses. | ||
=== Key #4: Worn Old Key (Shoushi) === | === Key #4: Worn Old Key (Shoushi) === | ||
| Line 56: | Line 42: | ||
# Hug the left wall until you reach a large room with some empty life stone foundations. | # Hug the left wall until you reach a large room with some empty life stone foundations. | ||
# From here, exit the room to the right, and continue straight ahead until you reach a ''Throne Room''. | # From here, exit the room to the right, and continue straight ahead until you reach a ''Throne Room''. | ||
# Kill [[Drudge Slave]]s in this room until you find a | # Kill [[Drudge Slave]]s in this room until you find a {{Itemlink|Worn Old Key}} on one of their corpses. | ||
=== Key #5: Worn Rusty Key (Samsur) === | === Key #5: Worn Rusty Key (Samsur) === | ||
| Line 62: | Line 48: | ||
# From the drop, take the first right, and then left at the split. Continue down the ramp, into an open area. | # From the drop, take the first right, and then left at the split. Continue down the ramp, into an open area. | ||
# From here, hug the wall left, until you descend down a ramp into a larger room that contains a small chamber that houses a pedistle and floating gem. | # From here, hug the wall left, until you descend down a ramp into a larger room that contains a small chamber that houses a pedistle and floating gem. | ||
# Kill [[Drudge Slave]]s until you find the | # Kill [[Drudge Slave]]s until you find the {{Itemlink|Worn Rusty Key}} on one of their corpses. | ||
=== Key #6: Worn Odd Key (Rithwic) === | === Key #6: Worn Odd Key (Rithwic) === | ||
| Line 68: | Line 54: | ||
# From the drop, take your first right, enter the third door on the left, and go down the ramp. | # From the drop, take your first right, enter the third door on the left, and go down the ramp. | ||
# At the bottom, take a left and enter the room with three [[Desert Rat]]s. | # At the bottom, take a left and enter the room with three [[Desert Rat]]s. | ||
# Kill the rats and loot the | # Kill the rats and loot the {{Itemlink|Worn Odd Key}} from one of their corpses. | ||
=== Key #7: A silvery, mysterious key (Al-Jalima) === | === Key #7: A silvery, mysterious key (Al-Jalima) === | ||
| Line 76: | Line 62: | ||
# Return to the drop, and this time take the west hallway until you reach a locked door. | # Return to the drop, and this time take the west hallway until you reach a locked door. | ||
# Use the Carved Key to unlock the door, head north on to the platform, and then jump across the to the north. | # Use the Carved Key to unlock the door, head north on to the platform, and then jump across the to the north. | ||
#* | #* Note: Do not jump into the pit directly front of you, jump across it on to the ledge. | ||
# Loot the | # Loot the {{Itemlink|Small Carved Key}} from a chest in a small room to the east. | ||
# Take the west ramp up, and hug the right wall until you reach a locked door. | # Take the west ramp up, and hug the right wall until you reach a locked door. | ||
# Use the Small Carved Key to open the door and head move to the ledge that extends from the east side. | # Use the Small Carved Key to open the door and head move to the ledge that extends from the east side. | ||
# Jump diagonally to the adjacent ledge to the Southeast (tap jump). | # Jump diagonally to the adjacent ledge to the Southeast (tap jump). | ||
# | # Note: If you fall, just take the ramp up to the West, and try again. | ||
# Once across the jump, take the South ramp down, and follow the hallway until you reach a room with several stone pillars and a few [[Shadow]]s. | # Once across the jump, take the South ramp down, and follow the hallway until you reach a room with several stone pillars and a few [[Shadow]]s. | ||
# Loot | # Loot {{Itemlink|A silvery, mysterious key}} from the [[Oak Chest]] on the south wall of this room. | ||
# Use the [[Halls of the Lost Light]] portal to enter the final dungeon. | # Use the [[Halls of the Lost Light]] portal to enter the final dungeon. | ||
=== Part 8: Halls of the Lost Light === | === Part 8: Halls of the Lost Light === | ||
# If you didn't take the portal from [[Carved Cave]], enter the [[Halls of the Lost Light]] at 76.5s, 74.9W near [[Candeth Keep]]. | # If you didn't take the portal from [[Carved Cave]], enter the [[Halls of the Lost Light]] at 76.5s, 74.9W near [[Candeth Keep]]. | ||
# From the drop, take the left door on the south wall and hug the wall left, using the keys you obtained to open the appropriate doors as you go (If you take the right door, hug the right wall). | # From the drop, take the left door on the south wall and hug the wall left, using the keys you obtained to open the appropriate doors as you go (If you take the right door, hug the right wall). | ||
#* | #* Note: Order of key use is as follows: [[Worn Strange Key]], [[Worn Small Key]], [[Worn Old Key]], [[Worn Plain Key]], [[Worn Rusty Key]], [[Worn Odd Key]], [[A silvery, mysterious key]]. | ||
# After using the [[Worn Odd Key]], jump down, and as you head north, you'll reach a wooden door on the North wall with an old cloth banner hanging above it. | # After using the [[Worn Odd Key]], jump down, and as you head north, you'll reach a wooden door on the North wall with an old cloth banner hanging above it. | ||
# Use [[A silvery, mysterious key]] to open the door and enter the final room and the end of the hallway. | # Use [[A silvery, mysterious key]] to open the door and enter the final room and the end of the hallway. | ||
# Kill the [[Guardian of the Lost Light]], and loot the [[Sword of Lost Light]] and [[Superior Shield]] from its corpse! | # Kill the [[Guardian of the Lost Light]], and loot the [[Sword of Lost Light]] and [[Superior Shield]] from its corpse! | ||
#* | #* Note: The guardian drops 1 set per spawn. Respawn is 5 minutes. | ||
{{Item Table|Caption=[[Quest Rumors]] | |||
| A note from Iquba | |||
| A Note from Tibri | |||
| A torn note | |||
| An odd note | |||
| An old note (Lich Archmage) | |||
| An old note (Monougas) | |||
| Crumpled Note | |||
| Rumor (Dungeons) | |||
| Rumor (Keys) | |||
}} | |||
=== Part 9: Upgrading the Sword === | === Part 9: Upgrading the Sword === | ||
''See also:'' [[Sword of Lost Light Infusions]] | |||
* The sword can be upgraded using volcanic infusions ([[Blue Fire Infusion]], [[Red Fire Infusion]], and [[White Fire Infusion]]) obtained from the [[Lady Aerfalle Quest]]. | * The sword can be upgraded using volcanic infusions ([[Blue Fire Infusion]], [[Red Fire Infusion]], and [[White Fire Infusion]]) obtained from the [[Lady Aerfalle Quest]]. | ||
* The upgraded sword can be converted to a [[Sword of Lost Hope]] by adding [[Blood of the Hopeslayer]], see [[Sword of Lost Hope Quest]] for details. | * The upgraded sword can be converted to a [[Sword of Lost Hope]] by adding [[Blood of the Hopeslayer]], see [[Sword of Lost Hope Quest]] for details. | ||
| Line 101: | Line 101: | ||
* An empowered sword can be further improved by adding one of three slayer infusions ([[Empowered Skeletonbane Infusion]], [[Empowered Shadowfire Infusion]], or [[Empowered Olthoibane Infusion]]), see [[Radiant Mana Infusion Quest]] for details. | * An empowered sword can be further improved by adding one of three slayer infusions ([[Empowered Skeletonbane Infusion]], [[Empowered Shadowfire Infusion]], or [[Empowered Olthoibane Infusion]]), see [[Radiant Mana Infusion Quest]] for details. | ||
== Maps == | {{Item Table|Caption=[[Upgrade Items]] | ||
| Blue Fire Infusion | |||
| Red Fire Infusion | |||
| White Fire Infusion | |||
| Blood of the Hopeslayer | |||
| Radiant Mana Infusion | |||
| Inert Skeletonbane Infusion | |||
| Empowered Skeletonbane Infusion | |||
| Inert Shadowfire Infusion | |||
| Empowered Shadowfire Infusion | |||
| Inert Olthoibane Infusion | |||
| Empowered Olthoibane Infusion | |||
}} | |||
== Dungeons & Maps == | |||
{{Dungeon Table | {{Dungeon Table | ||
| Table Rows = | | Table Rows = | ||
| Line 109: | Line 123: | ||
| Wiki Map File = | | Wiki Map File = | ||
| ACmaps ID = 01F6 | | ACmaps ID = 01F6 | ||
}} | }} | ||
{{Dungeon Maps | {{Dungeon Maps | ||
| Line 117: | Line 129: | ||
| Wiki Map File = | | Wiki Map File = | ||
| ACmaps ID = 01FB | | ACmaps ID = 01FB | ||
}} | }} | ||
{{Dungeon Maps | {{Dungeon Maps | ||
| Line 125: | Line 135: | ||
| Wiki Map File = | | Wiki Map File = | ||
| ACmaps ID = 01D0 | | ACmaps ID = 01D0 | ||
}} | }} | ||
{{Dungeon Maps | {{Dungeon Maps | ||
| Line 133: | Line 141: | ||
| Wiki Map File = | | Wiki Map File = | ||
| ACmaps ID = 01F7 | | ACmaps ID = 01F7 | ||
}} | }} | ||
{{Dungeon Maps | {{Dungeon Maps | ||
| Line 140: | Line 146: | ||
| Coordinates = 2.0S, 19.8E | | Coordinates = 2.0S, 19.8E | ||
| Wiki Map File = | | Wiki Map File = | ||
| ACmaps ID = 01E8 | | ACmaps ID = 01E8 | ||
}} | }} | ||
{{Dungeon Maps | {{Dungeon Maps | ||
| Line 148: | Line 152: | ||
| Coordinates = 14.0N, 59.1E | | Coordinates = 14.0N, 59.1E | ||
| Wiki Map File = | | Wiki Map File = | ||
| ACmaps ID = 01CD | | ACmaps ID = 01CD | ||
}} | }} | ||
{{Dungeon Maps | {{Dungeon Maps | ||
| Line 157: | Line 159: | ||
| Wiki Map File = | | Wiki Map File = | ||
| ACmaps ID = 018F | | ACmaps ID = 018F | ||
}} | }} | ||
{{Dungeon Maps | {{Dungeon Maps | ||
| Line 165: | Line 165: | ||
| Wiki Map File = | | Wiki Map File = | ||
| ACmaps ID = 01CE | | ACmaps ID = 01CE | ||
}} | }} | ||
}} | }} | ||
== | == Rewards == | ||
{{ | {{Rewards Table | ||
| | | Quest Task = | ||
| | | Item Reward = | ||
| | * {{Icon Link|Superior Shield}} | ||
| | * {{Icon Link|Sword of Lost Light}} | ||
| | | Max XP Reward = | Percent of Level = | Level Cap = | ||
| | | Repeat Max XP Reward = | Repeat Percent of Level = | Repeat Level Cap = | ||
| | | Luminance Reward = | ||
| | | Title Reward = | ||
| | | Other Reward = | ||
}} | }} | ||
== Images == | |||
<gallery widths=200px heights=200px perrow=4> | |||
File:Direlands Midland Portal Live.jpg||Entrance to the Halls of the Lost Light (Carved Cave) | |||
File:Halls of the Lost Light Live 2.jpg|Entrance to the Halls of the Lost Light | |||
File:Guardian of the Lost Light Live.jpg|Guardian of the Lost Light | |||
File:Sword of Lost Light (No Wield) Live.jpg|Sword of Lost Light | |||
</gallery> | |||
== Dialog == | |||
{{Tell| | |||
;Quest rumors | |||
|Iquba al-Julmud the Barkeeper tells you, "Welcome! What's your pleasure today? How about a fried egg? Or maybe directions to a mysterious sword?" | |||
|Town Crier tells you, "...and a warrior came forth bearing the mark of Light upon him. He carried, in his hand, the rays of the sun crafted into steel. A blade with a purpose in the hands of a virtuous heart brings hope where there is none. The Light has been found again." | |||
|Town Crier tells you, "I heard from Alatar Locke recently... he was upset that he had to redo some of his oldest notes... something about some carved caves?" | |||
|Town Crier tells you, "In the Halls of Lost Light the Guardian has stirred and the sword glows brighter now than ever. Perhaps this is an omen of things to come. Perhaps it is a sign that even in this growing darkness there is still hope." | |||
}} | }} | ||
== | == Update History == | ||
{{Update History| | |||
[[Release]] | |||
* Quest introduced. | |||
[[To Raise a Banner of Flame]] | |||
* Sword of Lost Light can now be upgraded using infusions. | |||
[[A Perfect Paradox]] | |||
* Level restrictions removed from most quest dungeons. | |||
* Pickup timer for infusions changed from once-per-character to 30 days. | |||
[[Into the Darkness]] | |||
* [[Superior Shield]] updated. | |||
* [[Sword of Lost Light]] updated. | |||
* Rumor and clue texts updated. | |||
* Dungeons creature spawns updated. | |||
[[The Quest for Freedom]] | |||
* Repeat timers changed from 6 days (30 days for infusions) to 20 hours. | |||
}} | |||
Latest revision as of 17:52, 7 March 2016
| Walkthrough & Notes Dungeons & Maps Rewards Images Dialog Update History |
| Sword of Lost Light Quest | |
|---|---|
| Level: | Any |
| Rec. Level: | 30+ |
| Type: | Solo |
| Starts At: | Holtburg Dungeon at 43.6N, 33.0E |
| Route: | Holtburg |
| Repeat: | 20 Hours |
Overview
After collecting seven keys inside different dungeons scattered across Dereth you can enter the Halls of Lost Light where the Guardian of the Lost Light wields the sword. The sword can be significantly upgraded via additional quests.
Walkthrough & Notes
Only a single set of keys is required and can be collected beforehand.
Key #1: Worn Small Key (Holtburg)
- From Holtburg, enter the Holtburg Dungeon at 43.6N, 33.0E
- From the drop, hug the left wall until you reach a down ramp.
- At the bottom of the ramp, enter the first room on your right and kill the Swamp Rats inside.
- Loot a Worn Small Key from the corpse of one of the rats.
Key #2: Worn Strange Key (Yaraq)
- From Yaraq, enter the Yaraq Tunnels at 24.6S, 1.4W.
- From the drop, go straight through the first two doors, leading to a large curving room.
- Take the south exit and hug the wall left until you reach a down ramp.
- At the bottom of the ramp, take your first right, and then your first left, which leads to another down ramp.
- At the bottom of the ramp, hug the wall right until you reach a 5-way intersection. Take the 2nd hall on the left.
- From here, head straight until you reach a dead end, where you'll find a few Drudge Slaves.
- Kill the slaves and loot the Worn Strange Key from one of their corpses.
Key #3: Worn Plain Key (Yanshi)
- From Yanshi, enter the Yanshi Tunnels at 12.2S, 45.5E,
- From the drop, hug the left wall until you reach a diamond shaped room, with a locked gate to the North, and several Drudge Slaves.
- Kill the Drudge Slaves and loot the Worn Plain Key from one of their corpses.
Key #4: Worn Old Key (Shoushi)
- From Shoushi, enter the Shoushi Grotto at 34.5S, 72.8E.
- From the drop, head straight, and take the ramp down into a larger rectangular room.
- Take the West exit, and then take the hallway on the right. Follow it until you descend a ramp.
- Hug the left wall until you reach a large room with some empty life stone foundations.
- From here, exit the room to the right, and continue straight ahead until you reach a Throne Room.
- Kill Drudge Slaves in this room until you find a Worn Old Key on one of their corpses.
Key #5: Worn Rusty Key (Samsur)
- From Samsur, enter the Dungeon Manor at 1.9S, 19.8E.
- From the drop, take the first right, and then left at the split. Continue down the ramp, into an open area.
- From here, hug the wall left, until you descend down a ramp into a larger room that contains a small chamber that houses a pedistle and floating gem.
- Kill Drudge Slaves until you find the Worn Rusty Key on one of their corpses.
Key #6: Worn Odd Key (Rithwic)
- From Rithwic, enter the Rithwic Crypt at 14.0N, 59.1E.
- From the drop, take your first right, enter the third door on the left, and go down the ramp.
- At the bottom, take a left and enter the room with three Desert Rats.
- Kill the rats and loot the Worn Odd Key from one of their corpses.
Key #7: A silvery, mysterious key (Al-Jalima)
- From Al-Jalima, enter the Carved Cave at 7.4N, 0.6E.
- From the drop, take the east hallway and then head straight into a large room.
- Loot the Carved Key from a chest in one of the smaller rooms to the left.
- Return to the drop, and this time take the west hallway until you reach a locked door.
- Use the Carved Key to unlock the door, head north on to the platform, and then jump across the to the north.
- Note: Do not jump into the pit directly front of you, jump across it on to the ledge.
- Loot the Small Carved Key from a chest in a small room to the east.
- Take the west ramp up, and hug the right wall until you reach a locked door.
- Use the Small Carved Key to open the door and head move to the ledge that extends from the east side.
- Jump diagonally to the adjacent ledge to the Southeast (tap jump).
- Note: If you fall, just take the ramp up to the West, and try again.
- Once across the jump, take the South ramp down, and follow the hallway until you reach a room with several stone pillars and a few Shadows.
- Loot A silvery, mysterious key from the Oak Chest on the south wall of this room.
- Use the Halls of the Lost Light portal to enter the final dungeon.
Part 8: Halls of the Lost Light
- If you didn't take the portal from Carved Cave, enter the Halls of the Lost Light at 76.5s, 74.9W near Candeth Keep.
- From the drop, take the left door on the south wall and hug the wall left, using the keys you obtained to open the appropriate doors as you go (If you take the right door, hug the right wall).
- Note: Order of key use is as follows: Worn Strange Key, Worn Small Key, Worn Old Key, Worn Plain Key, Worn Rusty Key, Worn Odd Key, A silvery, mysterious key.
- After using the Worn Odd Key, jump down, and as you head north, you'll reach a wooden door on the North wall with an old cloth banner hanging above it.
- Use A silvery, mysterious key to open the door and enter the final room and the end of the hallway.
- Kill the Guardian of the Lost Light, and loot the Sword of Lost Light and Superior Shield from its corpse!
- Note: The guardian drops 1 set per spawn. Respawn is 5 minutes.
![]() A note from Iquba
A note from Iquba![]() A Note from Tibri
A Note from Tibri![]() A torn note
A torn note![]() An odd note
An odd note![]() An old note (Lich Archmage)
An old note (Lich Archmage)![]() An old note (Monougas)
An old note (Monougas)![]() Crumpled Note
Crumpled Note![]() Rumor (Dungeons)
Rumor (Dungeons)![]() Rumor (Keys)
Rumor (Keys)
Part 9: Upgrading the Sword
See also: Sword of Lost Light Infusions
- The sword can be upgraded using volcanic infusions (Blue Fire Infusion, Red Fire Infusion, and White Fire Infusion) obtained from the Lady Aerfalle Quest.
- The upgraded sword can be converted to a Sword of Lost Hope by adding Blood of the Hopeslayer, see Sword of Lost Hope Quest for details.
- The upgraded sword can be empowered by adding an Radiant Mana Infusion, see Radiant Mana Infusion Quest for details.
- An empowered sword can be further improved by adding one of three slayer infusions (Empowered Skeletonbane Infusion, Empowered Shadowfire Infusion, or Empowered Olthoibane Infusion), see Radiant Mana Infusion Quest for details.
![]() Blue Fire Infusion
Blue Fire Infusion![]() Red Fire Infusion
Red Fire Infusion![]() White Fire Infusion
White Fire Infusion![]() Blood of the Hopeslayer
Blood of the Hopeslayer![]() Radiant Mana Infusion
Radiant Mana Infusion![]() Inert Skeletonbane Infusion
Inert Skeletonbane Infusion![]() Empowered Skeletonbane Infusion
Empowered Skeletonbane Infusion![]() Inert Shadowfire Infusion
Inert Shadowfire Infusion![]() Empowered Shadowfire Infusion
Empowered Shadowfire Infusion![]() Inert Olthoibane Infusion
Inert Olthoibane Infusion![]() Empowered Olthoibane Infusion
Empowered Olthoibane Infusion
Dungeons & Maps
| Dungeon | Coordinates | Wiki Map | ACmaps |
|---|---|---|---|
| Holtburg Dungeon | 43.5N, 33.0E | -- | 01F6 |
| Yaraq Tunnels | 24.8S, 1.4W | -- | 01FB |
| Yanshi Tunnels | 12.1S, 45.6E | -- | 01D0 |
| Shoushi Grotto | 34.4S, 72.8E | -- | 01F7 |
| Dungeon Manor | 2.0S, 19.8E | -- | 01E8 |
| Rithwic Crypt | 14.0N, 59.1E | -- | 01CD |
| Carved Cave | 7.5N, 0.6E | -- | 018F |
| Halls of the Lost Light | 76.5S, 74.9W | -- | 01CE |
Rewards
| Items: | |
Images
-
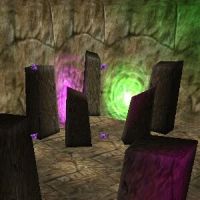
Entrance to the Halls of the Lost Light (Carved Cave)
-
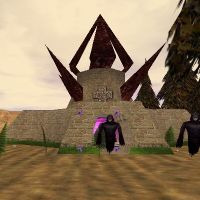
Entrance to the Halls of the Lost Light
-
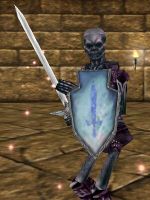
Guardian of the Lost Light
-
Sword of Lost Light


_Live.jpg)
Dialog
- Quest rumors
- Iquba al-Julmud the Barkeeper tells you, "Welcome! What's your pleasure today? How about a fried egg? Or maybe directions to a mysterious sword?"
- Town Crier tells you, "...and a warrior came forth bearing the mark of Light upon him. He carried, in his hand, the rays of the sun crafted into steel. A blade with a purpose in the hands of a virtuous heart brings hope where there is none. The Light has been found again."
- Town Crier tells you, "I heard from Alatar Locke recently... he was upset that he had to redo some of his oldest notes... something about some carved caves?"
- Town Crier tells you, "In the Halls of Lost Light the Guardian has stirred and the sword glows brighter now than ever. Perhaps this is an omen of things to come. Perhaps it is a sign that even in this growing darkness there is still hope."
Update History
|