User Interface: Difference between revisions
From Drunkapedia
imported>Arkalor |
imported>Arkalor m (reducing width of page (scroll bar appearing in default Wikia skin)) |
||
| (22 intermediate revisions by 3 users not shown) | |||
| Line 1: | Line 1: | ||
The Asheron's Call in-game tutorial, known as the [[Training Academy Quest]], introduces you to many of the following components. | The Asheron's Call in-game tutorial, known as the [[Training Academy Quest]], introduces you to many of the following components. | ||
== Visual Guide == | == Visual Guide == | ||
An example of the UI using the default settings and resolution of 800x600. Hover your mouse over areas of the screen for a description. Click an area for more information. | An example of the UI using the default settings and resolution of 800x600. Hover your mouse over areas of the screen for a description. Click an area for more information. | ||
{|border=0 cellpadding=0 cellspacing=0 | {|border=0 cellpadding=0 cellspacing=0 | ||
|align=left valign=top colspan=2| [[File:User-Interface 01.jpg|link=Health]][[File:User-Interface 02.jpg|link=Stamina]][[File:User-Interface 03.jpg|link=Mana]][[File:User-Interface 04.jpg|link=Status Panels|Status Panels]][[File:User-Interface 05.jpg|In Game Help]][[File:User-Interface 06.jpg|Exit Game]] | |align=left valign=top colspan=2| [[File:User-Interface 01.jpg|link=Health]][[File:User-Interface 02.jpg|link=Stamina]][[File:User-Interface 03.jpg|link=Mana]][[File:User-Interface 04.jpg|link=Status Panels|Status Panels]][[File:User-Interface 05.jpg|In Game Help]][[File:User-Interface 06.jpg|Exit Game]] | ||
| Line 22: | Line 18: | ||
|align=left valign=top rowspan=2| [[File:User-Interface 21.jpg|link=Inventory Panel#Container Slots|Open/Close Inventory]] | |align=left valign=top rowspan=2| [[File:User-Interface 21.jpg|link=Inventory Panel#Container Slots|Open/Close Inventory]] | ||
|- | |- | ||
|align=left valign=top| [[File:User-Interface 22.jpg|Use Selected | |align=left valign=top| [[File:User-Interface 22.jpg|link=Selected Target Bar|Use Selected Target]][[File:User-Interface 23.jpg|link=Selected Target Bar|Selected Target Bar]][[File:User-Interface 24.jpg|link=Examine Target Panel|Examine Selected Target]] | ||
|- | |- | ||
|align=left valign=top colspan=3|[[File:User-Interface 25.jpg|link=Inventory Panel#Shortcut Slots|Shortcut Slots]] | |align=left valign=top colspan=3|[[File:User-Interface 25.jpg|link=Inventory Panel#Shortcut Slots|Shortcut Slots]] | ||
|} | |} | ||
|} | |} | ||
{{big|'''Components of the UI'''}} | |||
{| | |||
|-valign=top | |||
| | | | ||
* Main Panels: | * Main Panels: | ||
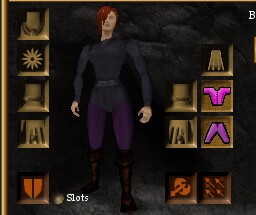
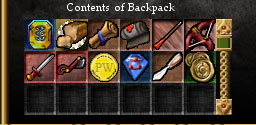
** [[Inventory Panel]] | ** [[Inventory Panel]] | ||
| Line 39: | Line 37: | ||
** [[Status Panels]] | ** [[Status Panels]] | ||
** [[Examine Target Panel]] | ** [[Examine Target Panel]] | ||
* Additional UI | | | ||
** [[ | * Additional UI Components: | ||
** [[Combat Mode]] | ** [[Chat Interface]] | ||
** [[ | ** [[Combat#Combat Mode|Combat Panel]] | ||
** [[Salvaging]] | ** [[Magic#Magic Mode|Spell Casting Panel]] | ||
* | ** [[Salvaging|Salvaging Panel]] | ||
** [[Secure Trade|Secure Trade Panel]] | |||
** [[Selected Target Bar]] | |||
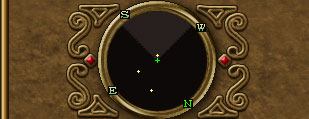
** [[Radar]] | ** [[Radar]] | ||
** [[Graphics|3D Display]] | ** [[Graphics|3D Display]] | ||
|} | |} | ||
[[Category:Game | == Managing the Interface == | ||
The following commands can be entered in the chat interface to save and load customised UI layouts. | |||
* Basic Save/Load UI: | |||
** Typing /saveui will save the current layout to a file called UI-Default.txt in the folder with your preferences. | |||
** Type /loadui loads that layout from UI-Default.txt. | |||
* Saving/Loading multiple UI layouts: | |||
** If you specify a filename with /saveui it will save the layout to a specific txt file by the same name: [filename].txt | |||
** If you specify a filename with /loadui it will attempt to load your layout from [filename].txt | |||
** Example: /saveui awesomemelee would create a file named awesomemelee.txt which you could then load using /loadui awesomemelee | |||
* Advanced Feature: Auto UI | |||
** /saveautoui - Save your layout in a file specific to your character and resolution. | |||
** If you change resolution while logged on that character, the game will attempt to load the layout you saved with /saveautoui. | |||
** It is possible to perform a save for each resolution you would like to use while playing that character, and the game will automatically switch between those resolutions. There is a /loadautoui command to force a load if it does not load automatically. | |||
=== Sharing UI Layouts === | |||
* UI files are saved in the same location as screenshots ( \\MyDocuments\Asheron's Call ) | |||
* You can make fine tuned adjustments by editing in notepad. | |||
* Simply place shared files in the same location and load using the chat commands in game. | |||
=== Decal Plugins === | |||
''See also: [[Plugins]]'' | |||
* [http://www.virindi.net/wiki/index.php/Virindi_Window_Tool Virindi Window Tool] gives you the option to save/load layouts with a User Interface rather than chat commands. Saves the location of AC panels as well as Decal Plugins. | |||
* Provides the "AC Old UI" option that forces the panels to assume their original positions, as well as move/adjust the screen as you use them. [[https://www.youtube.com/watch?v=Ir6kjAR5MH8 Example]] | |||
* If you capture a layout with AC Old UI enabled it will only affect plugins and the floating chat windows | |||
* VWT comes with the [http://www.virindi.net/plugins/ Virindi Tank Bundle] | |||
==See Also== | |||
* [[Character Login Screen]] | |||
* [[Commands]] | |||
* [[Game Mechanics]] | |||
==Update History== | |||
{{Update History| | |||
[[Castling]] | |||
* Keyboard binds for mapping a number of UI panels and character options added. | |||
[[Throne of Destiny]] expansion | |||
* New interface skin. | |||
* Pop-up dialogues. | |||
* Instead of logging out and changing the keys from the login screen, keys are changed in-game using a large pop-up interface. | |||
* Floating help system window that has branching, easy-to-navigate menus. | |||
* The chat window can now be resized smoothly by clicking and dragging on its upper edge. | |||
* To alert the player when new text has come in, a small, blinking arrow appears at the bottom of the chat box instead of automatically scrolling down. | |||
* The status text, that used to appear in the top corner, has been moved to the top center, made red and enlarged. | |||
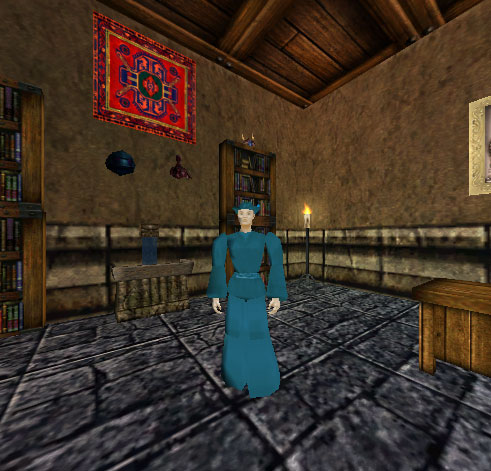
* You now see a 3D model of any person or monster, instead of a small icon, when you view them in the [[Examine Target Panel]]. | |||
[[Friend and Foe]] | |||
* Tooltip added for when you have dragged an item over to another object, player or NPC in the 3D window, so you can be sure you're about to hand it to the right thing or person. | |||
[[Blood From Stone]] | |||
* Mouse Turn & Movement introduced. | |||
[[Dreams of Torment]] | |||
* All panels are now moveable | |||
* When appropriate, many panels are resizable. | |||
* Panels can be locked in place. | |||
* Playable 3D space no longer changes when opening UI panel elements. | |||
* Examination panel has now been separated from other panels. | |||
* Examination panel text has been revamped. | |||
* Hotbar panel can be expanded to show nine additional slots. | |||
[[Feelings of Dread]] | |||
* Option for side by side vitals | |||
* Moved value & burden back to the top of examination | |||
* Examination panel now updates more frequently while in combat mode | |||
* SaveAutoUI file is now loaded upon login if character name, server, and resolution correctly matches | |||
}} | |||
[[Category:User Interface]] | |||
[[Category:Game Mechanic]] | |||
[[Category:Gameplay]] | |||
[[Category:Getting Started]] | |||
Latest revision as of 18:05, 2 March 2015
The Asheron's Call in-game tutorial, known as the Training Academy Quest, introduces you to many of the following components.
Visual Guide
An example of the UI using the default settings and resolution of 800x600. Hover your mouse over areas of the screen for a description. Click an area for more information.
 
|

| |||||||||
Components of the UI
|
Managing the Interface
The following commands can be entered in the chat interface to save and load customised UI layouts.
- Basic Save/Load UI:
- Typing /saveui will save the current layout to a file called UI-Default.txt in the folder with your preferences.
- Type /loadui loads that layout from UI-Default.txt.
- Saving/Loading multiple UI layouts:
- If you specify a filename with /saveui it will save the layout to a specific txt file by the same name: [filename].txt
- If you specify a filename with /loadui it will attempt to load your layout from [filename].txt
- Example: /saveui awesomemelee would create a file named awesomemelee.txt which you could then load using /loadui awesomemelee
- Advanced Feature: Auto UI
- /saveautoui - Save your layout in a file specific to your character and resolution.
- If you change resolution while logged on that character, the game will attempt to load the layout you saved with /saveautoui.
- It is possible to perform a save for each resolution you would like to use while playing that character, and the game will automatically switch between those resolutions. There is a /loadautoui command to force a load if it does not load automatically.
Sharing UI Layouts
- UI files are saved in the same location as screenshots ( \\MyDocuments\Asheron's Call )
- You can make fine tuned adjustments by editing in notepad.
- Simply place shared files in the same location and load using the chat commands in game.
Decal Plugins
See also: Plugins
- Virindi Window Tool gives you the option to save/load layouts with a User Interface rather than chat commands. Saves the location of AC panels as well as Decal Plugins.
- Provides the "AC Old UI" option that forces the panels to assume their original positions, as well as move/adjust the screen as you use them. [Example]
- If you capture a layout with AC Old UI enabled it will only affect plugins and the floating chat windows
- VWT comes with the Virindi Tank Bundle
See Also
Update History
Throne of Destiny expansion
|


