Lady Jaera's Tomb Quest: Difference between revisions
imported>Arkalor No edit summary |
imported>Arkalor No edit summary |
||
| Line 2: | Line 2: | ||
| Patch Introduced = [[Release]] | | Patch Introduced = [[Release]] | ||
| Related Quests = | | Related Quests = | ||
| Updated = [[A Small Victory]] | | Updated = [[A Small Victory]]<br>[[Ancient Enemies]]<br>[[Reforging the Past]] | ||
| | | | ||
| Live Image = Lady Jaera's Tomb Quest Live.jpg | | Live Image = Lady Jaera's Tomb Quest Live.jpg | ||
| Line 9: | Line 9: | ||
| Kill Task = False | | Kill Task = False | ||
| Start Location = [[Al-Jalima]] | | Start Location = [[Al-Jalima]] | ||
| Timer = | | Timer = 6 Days | ||
| Level Restrictions = | | Level Restrictions = None | ||
| Level Suggestions = 30+ | | Level Suggestions = 30+ | ||
| Item Rewards = Tier 4 Loot | | Item Rewards = Tier 4 [[Loot#Loot Properties|Loot]] | ||
| Max XP Reward = 118,000 | | Max XP Reward = 118,000 | ||
| Titles = | | Titles = | ||
| Line 26: | Line 26: | ||
}} | }} | ||
== Quest Overview == | == Quest Overview == | ||
In its heyday this quest offered great singularity level loot which justified the effort required. Now | In its heyday this quest offered great singularity level loot which justified the effort required. Now it's only really worth completing for nostalgia or fun. | ||
This quest involved lots of lever pulling on short timers and is recommended for 2 or more unless you have | This quest involved lots of lever pulling on short timers and is recommended for 2 or more unless you have high run skill. It helps to scout the different areas also, otherwise it can get quite confusing. | ||
== Walk Through == | == Walk Through == | ||
| Line 33: | Line 33: | ||
# Speak to [[Tazal al-Ashfai]] just outside of [[Al-Jalima]] at 6.1N, 3.5E. | # Speak to [[Tazal al-Ashfai]] just outside of [[Al-Jalima]] at 6.1N, 3.5E. | ||
# He will ask you to go to the [[Burial Temple]] at 8.5N, 6.0E and retrieve a black gem for him from the creature known as Kelannik. | # He will ask you to go to the [[Burial Temple]] at 8.5N, 6.0E and retrieve a black gem for him from the creature known as Kelannik. | ||
# | # When inside the temple, take the east passage and jump down. Now head to the end of the corridor and through a false wall. At the intersection head straight on through a room with Skeletons and at the T junction take a right. | ||
# In the next room go left and around to | # In the next room go left and around to a lever, use it and then take the north passage continuing on through two rooms - take the first left down the ramp and open the door. You will come to another door that is now open, inside this room is [[Lord Kelannik]] and his two guards. | ||
# Defeat Kelannik and | # Defeat Kelannik and loot the [[Black Gem]] and [[Cursed Key]]. Take the exit portal just outside the room and run back to Tazal al-Ashfai. | ||
# Hand Tazal the Black Gem for | # Hand Tazal the Black Gem for 118,000 experience and he will attempt to summon the portal Kelannik uses... | ||
==== The Mage Academy ==== | ==== The Mage Academy ==== | ||
'''Lockpick skill is needed for this part of the quest.''' | '''Lockpick skill is needed for this part of the quest.''' | ||
# From the drop room | ===== Levers 1 & 2 (Stone Key/Old Key) ===== | ||
# You should come to a room with | # From the drop room make a mental note of the lever to your right for later and head down the ramp hugging the left wall. You need to take the third turn off to the east on level 6 (see map). | ||
# | # You should come to a room with an [[Empyrean Statue]] and Iron Golem behind a lever activated door. | ||
# You now need to pull that lever in the portal drop room to open the room here with the Banderling Captain | # Leave this area amd turn right and then left at the T into a room with various Zefirs. Kill the green [[Kilif Zefir]]s and take the [[Stone Key]]. | ||
# Now you have the | # Now head west down the hall to the room opposite with 3 levers. Hit the wall levers only (center lever #3 releases the Iron Golem) and run back (left wall hug) to the ramp and up to the west room. Take a right and then left into the room that is now open. | ||
# To open door 4 go down as far as possible via the ramp and | # You now need to pull that lever in the portal drop room to open the room here with the Banderling Captain and the [[Old Key]]. | ||
# Note the locked metal | #* If you do not have a friend to help, simply use the floor plates here to reopen the door and run up and pull the lever yourself - but be quick. | ||
# | # Now you have the old key run back to the ramp and up into the east room. Go right and then open the door here using the key. Inside this room is a gate that requires lockpicking and another lever operated door (door 4 on map) with lever to door 5 behind that. | ||
# If you have a friend with lockpick, get him to do the next step, unlock the metal door and wait at door 5. You can wait here ready to pull lever 5 in the meantime. | |||
===== Levers 4 & 5 ===== | |||
# To open door 4 go down as far as possible via the main ramp and pick open the wooden door, the lever to door 4 is behind it. | |||
#* Note the locked metal gates opposite this lever, lever 5 opens the large metal doors in the room beyond. | |||
# If neccessary, head back up to door 4, pull lever 5 and then come back again. Unlock one of the metal gates and head into the sewer area via door 5. | |||
# Ignore the first junction and keep going east around to a locked metal door, use the [[Cursed Key]] to open it. | # Ignore the first junction and keep going east around to a locked metal door, use the [[Cursed Key]] to open it. | ||
# Go up the ramp and stick to the path ignoring all side rooms | # Go up the ramp and stick to the path ignoring all the smaller side rooms. You will cross bridges that pass through a number of areas, hop from the final ledge into the east passage and then jump down into a room with a surface portal and Lich Lord. | ||
# Here you find the library where [[Rytheran's Apprentice]] awaits. Defeat him and take [[Rytheran's Key]] and [[Sheets of Paper]] for translation. Now you have Rytheran's Key you need to make your way to Lady Jaera's Tomb. | |||
# Use the surface portal and reenter the academy, go back to the room with the statue and the golem behind a lever door (third room down). Go south east and hug the left wall until you reach a room with pillars and an [[Obsidian Golem]] guarding a door. | # Use the surface portal and reenter the academy, go back to the room with the statue and the golem behind a lever door (third room down). Go south east and hug the left wall until you reach a room with pillars and an [[Obsidian Golem]] guarding a door. | ||
# Kill the Golem and use the [[Stone Key]] on the door. | # Kill the Golem and use the [[Stone Key]] on the door. There are lightning traps in this room, dispatch the two Golems here if you're low level as the tomb will cast Imperil level 5 on you. | ||
# Use [[Rytheran's Key]] on [[Lady Jaera's Tomb]] for your rewards. | # Use [[Rytheran's Key]] on [[Lady Jaera's Tomb]] for your rewards. | ||
| Line 76: | Line 83: | ||
== Items == | == Items == | ||
{{Item Table | {{Item Table | ||
| Caption=Quest Items | | Caption=Quest Items | ||
| Black Gem | | Black Gem | ||
| Cursed Key | | Cursed Key | ||
| | | Stone Key | ||
| Old Key | | Old Key | ||
| Rytheran's Key | | Rytheran's Key | ||
| | | Sheets of Paper | ||
| Lady Jaera's Tomb | | Lady Jaera's Tomb | ||
}} | }} | ||
== Images == | == Images == | ||
<gallery widths= | <gallery widths=190px heights=190px perrow=4> | ||
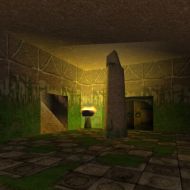
File:Lady Jaera's Tomb Quest Live 2.jpg|Burial Temple | File:Lady Jaera's Tomb Quest Live 2.jpg|Burial Temple | ||
File:Lady Jaera's Tomb Quest Live 3.jpg| | File:Lady Jaera's Tomb Quest Live 3.jpg|Empyrean Statue and locked Golem | ||
File:Lady Jaera's Tomb Quest Live 4.jpg|Rytheran's Library | File:Lady Jaera's Tomb Quest Live 4.jpg|Rytheran's Library | ||
File:Lady Jaera's Tomb Quest Live 5.jpg|Area with Lady Jaera's Tomb | File:Lady Jaera's Tomb Quest Live 5.jpg|Area with Lady Jaera's Tomb | ||
| Line 101: | Line 107: | ||
Tazal al-Ashfai tells you, "Through my studies, I have found that the dreadful creature is named Kelannik."<br> | Tazal al-Ashfai tells you, "Through my studies, I have found that the dreadful creature is named Kelannik."<br> | ||
Tazal al-Ashfai tells you, "Please retrieve this gem and return it to me. Your courage will not go unrewarded." | Tazal al-Ashfai tells you, "Please retrieve this gem and return it to me. Your courage will not go unrewarded." | ||
---- | |||
<font color=green> | <font color=green> | ||
You give Tazal al-Ashfai Black Gem.</font><br> | You give Tazal al-Ashfai Black Gem.</font><br> | ||
| Line 114: | Line 120: | ||
</font> | </font> | ||
---- | ---- | ||
<font color=green> | |||
A voice in your mind sneers, "Oh for the throne and all that comes with it... Guards!<br> | |||
You smite Rytheran's Apprentice mightily!<br> | |||
The Dericost's body collapses into rot and dust, but a voice in your mind sneers, "Pathetic little wretch! I shall rise again soon enough."</font> | |||
---- | |||
<font color=green>You give Kuyiza bint Zayi the Translator Sheets of Paper.</font><br> | <font color=green>You give Kuyiza bint Zayi the Translator Sheets of Paper.</font><br> | ||
<font color=darkgoldenrod>Kuyiza bint Zayi the Translator tells you, "Indeed, this is the runic script of old Dericost, a language not used in well over 5000 years... Save for this letter, which looks newly written..."</font><br> | <font color=darkgoldenrod>Kuyiza bint Zayi the Translator tells you, "Indeed, this is the runic script of old Dericost, a language not used in well over 5000 years... Save for this letter, which looks newly written..."</font><br> | ||
| Line 126: | Line 136: | ||
* During the [[A Small Victory]] event, the [[Burial Temple]] was updated with higher level creatures and the [[Skeleton Lord]] which originally dropped the [[Black Gem]] and [[Cursed Key]] was replaced with [[Lord Kelannik]]. | * During the [[A Small Victory]] event, the [[Burial Temple]] was updated with higher level creatures and the [[Skeleton Lord]] which originally dropped the [[Black Gem]] and [[Cursed Key]] was replaced with [[Lord Kelannik]]. | ||
* During the [[Ancient Enemies]] event, [[Lord Rytheran]] moved to the [[Graveyard]] and was replaced with [[Rytheran's Apprentice]]. | * During the [[Ancient Enemies]] event, [[Lord Rytheran]] moved to the [[Graveyard]] and was replaced with [[Rytheran's Apprentice]]. | ||
* Quest timer standardized to 6 days during the [[Reforging the Past]] event. | |||
Revision as of 08:54, 18 February 2010
| Walkthrough & Notes Dungeons & Maps Rewards Images Dialog Update History |
| Lady Jaera's Tomb Quest | |
|---|---|
| Level: | ?? |
| Type: | Solo/Small Group |
| Starts At: | ?? |
| Repeat: | ?? |
Quest Overview
In its heyday this quest offered great singularity level loot which justified the effort required. Now it's only really worth completing for nostalgia or fun. This quest involved lots of lever pulling on short timers and is recommended for 2 or more unless you have high run skill. It helps to scout the different areas also, otherwise it can get quite confusing.
Walk Through
The Burial Temple
- Speak to Tazal al-Ashfai just outside of Al-Jalima at 6.1N, 3.5E.
- He will ask you to go to the Burial Temple at 8.5N, 6.0E and retrieve a black gem for him from the creature known as Kelannik.
- When inside the temple, take the east passage and jump down. Now head to the end of the corridor and through a false wall. At the intersection head straight on through a room with Skeletons and at the T junction take a right.
- In the next room go left and around to a lever, use it and then take the north passage continuing on through two rooms - take the first left down the ramp and open the door. You will come to another door that is now open, inside this room is Lord Kelannik and his two guards.
- Defeat Kelannik and loot the Black Gem and Cursed Key. Take the exit portal just outside the room and run back to Tazal al-Ashfai.
- Hand Tazal the Black Gem for 118,000 experience and he will attempt to summon the portal Kelannik uses...
The Mage Academy
Lockpick skill is needed for this part of the quest.
Levers 1 & 2 (Stone Key/Old Key)
- From the drop room make a mental note of the lever to your right for later and head down the ramp hugging the left wall. You need to take the third turn off to the east on level 6 (see map).
- You should come to a room with an Empyrean Statue and Iron Golem behind a lever activated door.
- Leave this area amd turn right and then left at the T into a room with various Zefirs. Kill the green Kilif Zefirs and take the Stone Key.
- Now head west down the hall to the room opposite with 3 levers. Hit the wall levers only (center lever #3 releases the Iron Golem) and run back (left wall hug) to the ramp and up to the west room. Take a right and then left into the room that is now open.
- You now need to pull that lever in the portal drop room to open the room here with the Banderling Captain and the Old Key.
- If you do not have a friend to help, simply use the floor plates here to reopen the door and run up and pull the lever yourself - but be quick.
- Now you have the old key run back to the ramp and up into the east room. Go right and then open the door here using the key. Inside this room is a gate that requires lockpicking and another lever operated door (door 4 on map) with lever to door 5 behind that.
- If you have a friend with lockpick, get him to do the next step, unlock the metal door and wait at door 5. You can wait here ready to pull lever 5 in the meantime.
Levers 4 & 5
- To open door 4 go down as far as possible via the main ramp and pick open the wooden door, the lever to door 4 is behind it.
- Note the locked metal gates opposite this lever, lever 5 opens the large metal doors in the room beyond.
- If neccessary, head back up to door 4, pull lever 5 and then come back again. Unlock one of the metal gates and head into the sewer area via door 5.
- Ignore the first junction and keep going east around to a locked metal door, use the Cursed Key to open it.
- Go up the ramp and stick to the path ignoring all the smaller side rooms. You will cross bridges that pass through a number of areas, hop from the final ledge into the east passage and then jump down into a room with a surface portal and Lich Lord.
- Here you find the library where Rytheran's Apprentice awaits. Defeat him and take Rytheran's Key and Sheets of Paper for translation. Now you have Rytheran's Key you need to make your way to Lady Jaera's Tomb.
- Use the surface portal and reenter the academy, go back to the room with the statue and the golem behind a lever door (third room down). Go south east and hug the left wall until you reach a room with pillars and an Obsidian Golem guarding a door.
- Kill the Golem and use the Stone Key on the door. There are lightning traps in this room, dispatch the two Golems here if you're low level as the tomb will cast Imperil level 5 on you.
- Use Rytheran's Key on Lady Jaera's Tomb for your rewards.
Maps
| Dungeon | Coordinates | Wiki Map | ACmaps |
|---|---|---|---|
| Burial Temple | 8.5N, 6.0E | -- | 013E |
| Mage Academy | 74.7N, 18.5E | -- | 0139 |
Items
![]() Black Gem
Black Gem![]() Cursed Key
Cursed Key![]() Stone Key
Stone Key![]() Old Key
Old Key![]() Rytheran's KeyFile:Sheets of Paper Icon.png Sheets of Paper
Rytheran's KeyFile:Sheets of Paper Icon.png Sheets of Paper![]() Lady Jaera's Tomb
Lady Jaera's Tomb
Images
-
Burial Temple
-
Empyrean Statue and locked Golem
-
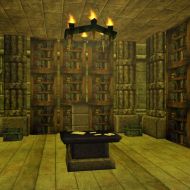
Rytheran's Library
-
Area with Lady Jaera's Tomb


Lore & Dialog
Tazal al-Ashfai tells you, "Hail, traveler. It is pleasant to meet anyone here in the wastes. Tell me, have you discovered a crypt in these regions called the Burial Temple?"
Tazal al-Ashfai tells you, "I have heard that the dead walk there, and one in particular always carries a certain black gem I seek for my research."
Tazal al-Ashfai tells you, "Through my studies, I have found that the dreadful creature is named Kelannik."
Tazal al-Ashfai tells you, "Please retrieve this gem and return it to me. Your courage will not go unrewarded."
You give Tazal al-Ashfai Black Gem.
Tazal al-Ashfai tells you, "Wonderful! Can you see the portal energy pulsing within it?"
You've earned 118,000 experience.
Tazal al-Ashfai tells you, "No doubt you have seen and experienced much on this adventure!"
Tazal al-Ashfai tells you, "I have heard stories that the ancient dead of Dereth talk to each other as we do, and form a society underneath our own..."
Tazal al-Ashfai says, "Let us see where this Kelannik fellow liked to travel."
Tazal al-Ashfai tells you, "Why, I do believe that this portal leads to the Mage Academy! Beware young traveler, this place is not for the faint of heart..."
A voice in your mind sneers, "Oh for the throne and all that comes with it... Guards!
You smite Rytheran's Apprentice mightily!
The Dericost's body collapses into rot and dust, but a voice in your mind sneers, "Pathetic little wretch! I shall rise again soon enough."
You give Kuyiza bint Zayi the Translator Sheets of Paper.
Kuyiza bint Zayi the Translator tells you, "Indeed, this is the runic script of old Dericost, a language not used in well over 5000 years... Save for this letter, which looks newly written..."
Kuyiza bint Zayi looks slightly troubled.
Kuyiza bint Zayi the Translator tells you, "This was found on Rytheran's Apprentice? It seems Rytheran is up to something involving that ancient graveyard and some book that was powerful enough to scare even the ancient Dericost into not using it."
Kuyiza bint Zayi shudders
Kuyiza bint Zayi the Translator tells you, "Here, see for yourself."
Kuyiza bint Zayi the Translator gives you Rytheran's Letter.
Notes
- During the A Small Victory event, the Burial Temple was updated with higher level creatures and the Skeleton Lord which originally dropped the Black Gem and Cursed Key was replaced with Lord Kelannik.
- During the Ancient Enemies event, Lord Rytheran moved to the Graveyard and was replaced with Rytheran's Apprentice.
- Quest timer standardized to 6 days during the Reforging the Past event.