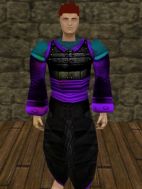
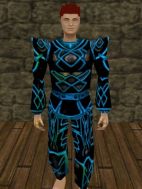
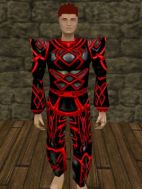
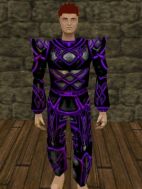
Sharded Shadow Armor Quest: Difference between revisions
From Drunkapedia
imported>Arkalor (→Images) |
imported>Arkalor No edit summary |
||
| Line 33: | Line 33: | ||
#* Koujia = 3 Shards | #* Koujia = 3 Shards | ||
#* Celdon = 4 Shards | #* Celdon = 4 Shards | ||
#** Armor shards drop on [[Crystal Shard]]s and [[Sentient | #** Armor shards drop on [[Crystal Shard]]s and [[Sentient Crystal Shard]]s. Crystal Shards spawn in the north western parts of Osteth and most of the Direlands. Sentient Shards can be found in the [[Valley of Death]]. | ||
# Simply click on a Shard to use it on a piece of armor. Do this once for EACH PIECE of armor. | # Simply click on a Shard to use it on a piece of armor. Do this once for EACH PIECE of armor. | ||
#* DO NOT use the same type of shard on multiple pieces. This is NOT NEEDED, and results in doubling up of the protection spells that the sharded armor provides and is a waste of the Armor AND Shards.<br><br> | #* DO NOT use the same type of shard on multiple pieces. This is NOT NEEDED, and results in doubling up of the protection spells that the sharded armor provides and is a waste of the Armor AND Shards.<br><br> | ||
== Items == | == Items == | ||
=== Examples === | |||
{| | {|class=wikitable | ||
|- | |- | ||
!Shard | !Shard | ||
!Spell | !Spell | ||
| Line 53: | Line 53: | ||
| align=center|{{Icon|Charged Shard}} | | align=center|{{Icon|Charged Shard}} | ||
| [[Major Storm Ward]] | | [[Major Storm Ward]] | ||
| align=center|{{Icon|Greater | | align=center|{{Icon|Greater Celdon Shadow Leggings}} {{Icon|Greater Celdon Shadow Girth}} | ||
| align=center|{{Icon|Charged | | align=center|{{Icon|Charged Celdon Leggings}} {{Icon|Charged Celdon Girth}} | ||
|- | |- | ||
| align=center|{{Icon|Chilled Shard}} | | align=center|{{Icon|Chilled Shard}} | ||
| [[Major Frost Ward]] | | [[Major Frost Ward]] | ||
| align=center|{{Icon|Greater | | align=center|{{Icon|Greater Koujia Shadow Sleeves}} {{Icon|Greater Celdon Shadow Breastplate}} | ||
| align=center|{{Icon| | | align=center|{{Icon|Frosty Koujia Sleeves}} {{Icon|Frosty Celdon Breastplate}} | ||
|- | |- | ||
| align=center|{{Icon|Hardened Shard}} | | align=center|{{Icon|Hardened Shard}} | ||
| [[Major Piercing Ward]] | | [[Major Piercing Ward]] | ||
| align=center|{{Icon|Greater | | align=center|{{Icon|Greater Amuli Shadow Leggings}} {{Icon|Greater Koujia Shadow Breastplate}} | ||
| align=center|{{Icon|Hardened | | align=center|{{Icon|Hardened Amuli Leggings}} {{Icon|Hardened Koujia Breastplate}} | ||
|- | |- | ||
| align=center|{{Icon|Plated Shard}} | | align=center|{{Icon|Plated Shard}} | ||
| [[Major Bludgeoning Ward]] | | [[Major Bludgeoning Ward]] | ||
| align=center|{{Icon|Greater Amuli Shadow Coat}} {{Icon|Greater | | align=center|{{Icon|Greater Amuli Shadow Coat}} {{Icon|Greater Alduressa Shadow Coat}} | ||
| align=center|{{Icon|Plated Amuli Coat}} {{Icon|Plated | | align=center|{{Icon|Plated Amuli Coat}} {{Icon|Plated Alduressa Coat}} | ||
|- | |- | ||
| align=center|{{Icon|Scored Shard}} | | align=center|{{Icon|Scored Shard}} | ||
| [[Major Acid Ward]] | | [[Major Acid Ward]] | ||
| align=center|{{Icon|Greater | | align=center|{{Icon|Greater Koujia Shadow Breastplate}} {{Icon|Greater Koujia Shadow Sleeves}} | ||
| align=center|{{Icon|Scored | | align=center|{{Icon|Scored Koujia Breastplate}} {{Icon|Scored Koujia Sleeves}} | ||
|- | |- | ||
| align=center|{{Icon|Seared Shard}} | | align=center|{{Icon|Seared Shard}} | ||
| Line 83: | Line 83: | ||
| align=center|{{Icon|Solid Shard}} | | align=center|{{Icon|Solid Shard}} | ||
| [[Major Slashing Ward]] | | [[Major Slashing Ward]] | ||
| align=center|{{Icon|Greater Amuli Shadow | | align=center|{{Icon|Greater Amuli Shadow Coat}} {{Icon|Greater Alduressa Shadow Leggings}} | ||
| align=center|{{Icon|Solid Amuli | | align=center|{{Icon|Solid Amuli Coat}} {{Icon|Solid Alduressa Leggings}} | ||
|} | |} | ||
| Line 100: | Line 100: | ||
== Images == | == Images == | ||
<gallery widths= | === Sharded Alduressa === | ||
File: | <gallery widths=190px heights=190px perrow=4> | ||
File: | File:Sharded Greater Alduressa Armor Live.jpg | ||
File:Sharded Greater Alduressa Armor (Blue) Live.jpg | |||
File:Sharded Greater Alduressa Armor (Red) Live.jpg | |||
File:Sharded Greater Alduressa Armor (Violet) Live.jpg | |||
</gallery> | |||
=== Sharded Amuli === | |||
<gallery widths=190px heights=190px perrow=4> | |||
File:Sharded Greater Amuli Armor Live.jpg | |||
File:Sharded Greater Amuli Armor (Blue) Live.jpg | |||
File:Sharded Greater Amuli Armor (Red) Live.jpg | |||
File:Sharded Greater Amuli Armor (Violet) Live.jpg | |||
</gallery> | |||
=== Sharded Celdon === | |||
<gallery widths=190px heights=190px perrow=4> | |||
File:Sharded Greater Celdon Armor Live.jpg | |||
File:Sharded Greater Celdon Armor (Blue) Live.jpg | |||
File:Sharded Greater Celdon Armor (Red) Live.jpg | |||
File:Sharded Greater Celdon Armor (Violet) Live.jpg | |||
</gallery> | |||
=== Sharded Koujia === | |||
<gallery widths=190px heights=190px perrow=4> | |||
File:Sharded Greater Koujia Armor Live.jpg | |||
File:Sharded Greater Koujia Armor (Blue) Live.jpg | |||
File:Sharded Greater Koujia Armor (Red) Live.jpg | |||
File:Sharded Greater Koujia Armor (Violet) Live.jpg | |||
</gallery> | </gallery> | ||
== Notes == | == Notes == | ||
* During the [[Mirror, Mirror]] event, this quest was upgraded to allow you to dye Sharded Shadow Armor. | * During the [[Mirror, Mirror]] event, this quest was upgraded to allow you to dye Sharded Shadow Armor. | ||
Revision as of 16:44, 2 June 2010
| Walkthrough & Notes Dungeons & Maps Rewards Images Dialog Update History |
| Sharded Shadow Armor Quest | |
|---|---|
| Level: | ?? |
| Type: | Solo |
| Starts At: | ?? |
| Repeat: | ?? |
General
- You must already have completed the Shadow Armor Quest in order to create Sharded Shadow Armor.
Walk Through
- To create Sharded Shadow Armor, you need a set of Greater Shadow Armor and 1 Shard for EACH PIECE of the Greater Shadow Armor.
- Alduressa / Amuli = 2 Shards
- Koujia = 3 Shards
- Celdon = 4 Shards
- Armor shards drop on Crystal Shards and Sentient Crystal Shards. Crystal Shards spawn in the north western parts of Osteth and most of the Direlands. Sentient Shards can be found in the Valley of Death.
- Simply click on a Shard to use it on a piece of armor. Do this once for EACH PIECE of armor.
- DO NOT use the same type of shard on multiple pieces. This is NOT NEEDED, and results in doubling up of the protection spells that the sharded armor provides and is a waste of the Armor AND Shards.
- DO NOT use the same type of shard on multiple pieces. This is NOT NEEDED, and results in doubling up of the protection spells that the sharded armor provides and is a waste of the Armor AND Shards.
Items
Examples
| Shard | Spell | Shadow Armor Piece | Result |
|---|---|---|---|
| Major Armor | |||
| Major Storm Ward | |||
| Major Frost Ward | |||
| Major Piercing Ward | |||
| Major Bludgeoning Ward | |||
| Major Acid Ward | |||
| Major Flame Ward | |||
| Major Slashing Ward |
Sharded Shadow Dye
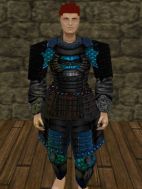
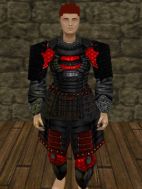
To dye Sharded Shadow Armor, visit Miko Li, Jojii Adherent at 83.3S, 47.2E in Kara. Hand her the appropriate vial for the color of dye you want:
![]() Vial of Relanim Dye
Vial of Relanim Dye![]() Vial of Lapyan Dye
Vial of Lapyan Dye![]() Vial of Hennacin Dye
Vial of Hennacin Dye![]() Violet Armor Paint
Violet Armor Paint![]() Blue Armor Paint
Blue Armor Paint![]() Red Armor Paint
Red Armor Paint
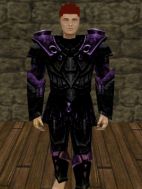
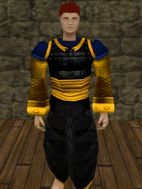
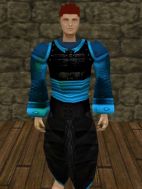
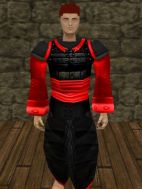
Images
Sharded Alduressa
Sharded Amuli
Sharded Celdon
Sharded Koujia
Notes
- During the Mirror, Mirror event, this quest was upgraded to allow you to dye Sharded Shadow Armor.


