Template:Map Point: Difference between revisions
imported>Tlosk No edit summary |
imported>Tlosk (→Usage) |
||
| Line 63: | Line 63: | ||
You can optionally specify the marker for the points by adding a <Marker = Small> parameter. You can create new markers if desired, create a 9x9 pixel png image with transparency if it doesn't cover the entire area (center the image if not). Name the file "Map Point <Name>.png" and upload it and simply refer to it as <Name> (for example, Map Point Large.png is referenced as Large). | You can optionally specify the marker for the points by adding a <Marker = Small> parameter. You can create new markers if desired, create a 9x9 pixel png image with transparency if it doesn't cover the entire area (center the image if not). Name the file "Map Point <Name>.png" and upload it and simply refer to it as <Name> (for example, Map Point Large.png is referenced as Large). | ||
Whether you specify a caption at the end or leave it blank, if you have more than a single set of coordinates it each coordinate must be followed by another pipe ( | ). If this pipe is missing, the variable count will be off and the page will not render (white page). To use a larger map, to display more than 4 points, or to specify a particular marker for each individual point, use [[Template:Map Point Plus]]. | Whether you specify a caption at the end or leave it blank, if you have more than a single set of coordinates it each coordinate must be followed by another pipe ( | ). If this pipe is missing, the variable count will be off and the page will not render (white page). If you accidentally do this, use your browser back button to get to an edit screen as there will be no edit tab visible. To use a larger map, to display more than 4 points, or to specify a particular marker for each individual point, use [[Template:Map Point Plus]]. | ||
{|border=0 cellpadding=5 | {|border=0 cellpadding=5 | ||
Revision as of 15:59, 21 January 2009
Related topics: Template:Map Point Plus, Points of Interest, Wiki Templates
Syntax
{{Map Point | <Coords> | <N or S> | <Coords> | <E or W>| }}

{{Map Point | | | | }}

{{Map Point | Marker = <Name>| <Coords> | <N or S> | <Coords> | <E or W> | <Popup Caption> }}

{{Map Point
 | | | | |
 | | | | |
 | | | | |
 | | | | |
}}
Usage
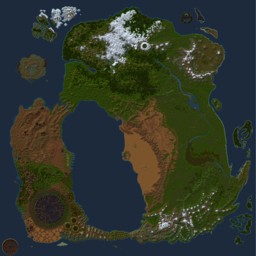
Displays a particular location on a small map of Dereth given specific coordinates. You can use either upper or lower case letters (e, w, n, s or E, W, N, S). Note that because the coordinates need to be transformed into a point on the map, if a coordinate or direction parameter is missing or malformed the page will not render correctly.
You can optionally specify the marker for the points by adding a <Marker = Small> parameter. You can create new markers if desired, create a 9x9 pixel png image with transparency if it doesn't cover the entire area (center the image if not). Name the file "Map Point <Name>.png" and upload it and simply refer to it as <Name> (for example, Map Point Large.png is referenced as Large).
Whether you specify a caption at the end or leave it blank, if you have more than a single set of coordinates it each coordinate must be followed by another pipe ( | ). If this pipe is missing, the variable count will be off and the page will not render (white page). If you accidentally do this, use your browser back button to get to an edit screen as there will be no edit tab visible. To use a larger map, to display more than 4 points, or to specify a particular marker for each individual point, use Template:Map Point Plus.
| For example: | |
{{Map Point|12.9|S|51.5|E|}}
|
{{Map Point|Marker=Dungeon|34.9|N|54.5|E|Abandoned Mine}}
|
| displays as: | |
| For example: | |
{{Map Point
 |64|S|63.8|W|
 |65.9|N|12.9|E|
 |51.5|N|74.6|w|
 |60.2|s|88.5|e|
}}
|
{{Map Point
 |Marker=Medium
 |64|S|63.8|W|Obsidian Plains
 |65.9|N|12.9|E|Crater Village
 |51.5|N|74.6|w|Dam Reservoir
 |60.2|s|88.5|e|Mayoi Point
}}
|
| displays as: | |

