Colosseum Arena: Difference between revisions
From Drunkapedia
imported>Arkalor m (Text replace - " | Item Rewards = " to " | Contracts = | Item Rewards = ") |
imported>An Adventurer (making table collapsible / collapsed) |
||
| Line 1: | Line 1: | ||
{{Related|Colosseum | {{Related|Colosseum}} | ||
{{Quest Summary | {{Quest Summary | ||
| | | Level = Any | ||
| | | Recommended Level = | ||
| Quest Type = Locked Fellowship | | Quest Type = Locked Fellowship | ||
| | | Starts With = [[Master Arbitrator]] | ||
| | | Starts At = [[Colosseum]] | ||
| Timer = 1 | | Route = [[Yanshi]] to 11.3S, 37.6E | ||
| Time to Complete = 1 | | Repeat Timer = 1 Hour | ||
| Time to Complete = 1 Hour | |||
| Contracts = | | Contracts = | ||
}} | }} | ||
== | == Overview == | ||
Also known as "Colosseum Flagging", the first 5 arena's of the Colosseum are usually only accessed by younger toons and/or those who wish to flag to be able to do the [[Colosseum Bosses]]. | Also known as "Colosseum Flagging", the first 5 arena's of the Colosseum are usually only accessed by younger toons and/or those who wish to flag to be able to do the [[Colosseum Bosses]]. | ||
If you're interested in doing the tougher rooms beyond room 5, see the [[Advanced Colosseum Arena]]. | |||
== | == Walkthrough & Notes == | ||
# Exchange five MMDs or one tier 1/2 rare gem for a {{Itemlink|Colosseum Ticket}} from the [[Colosseum Ticket Vendor]]. | |||
# Hand the ticket to the [[Master Arbitrator]] to flag the fellowship to enter the arena. | |||
# Enter the Colosseum Arena using the door to the left of the Master Arbitrator. | |||
# Progress through 5 rooms of the arena within 1 hour. See the room guide below to prepare for what creatures you will encounter in the standard arena. | |||
# {{Warning}} You must use the exit door to have completed a room. For example, killing the spawn in room 4 then using the door and entering room 5 counts as having beaten 4. | |||
# Once your timer is up, speak to the Master Arbitrator to receive your rewards. | |||
;Rooms of the Colosseum Arena | |||
{|class="wikitable mw-collapsible mw-collapsed" | |||
!Room | |||
!Spawn | |||
!Creatures | |||
|- | |||
|rowspan=2 align=center|1 | |||
|Spawn 1 | |||
= | | | ||
* [[Iron Golem]] | |||
* [[Copper Golem]] | |||
* [[Granite Golem]] | |||
* [[Unstable Magma Golem]] | |||
|- | |||
|Spawn 2 | |||
| | |||
* [[Risen Knight]] | |||
* [[Skeleton Lord]] | |||
* [[Skeleton Wraith]] | |||
* [[Lich Lord]] | |||
|- | |||
!Room | !Room | ||
! | !Spawn | ||
! | !Creatures | ||
|- | |- | ||
|align=center| | |rowspan=2 align=center|2 | ||
| | |Spawn 1 | ||
| | |||
* [[Innocent Doll]] | |||
* [[Pristine Doll]] | |||
* [[Contained Rift]] | |||
* [[Charge]] | |||
* [[Flamma]] | |||
* [[Flare]] | |||
* [[Frost]] | |||
* [[Gout]] | |||
|- | |- | ||
| | |Spawn 2 | ||
| | | | ||
* [[Banderling Berserker]] | |||
* [[Banderling Rogue]] | |||
* [[Banderling Striker]] | |||
* | |||
|- | |- | ||
!Room | |||
!Spawn | |||
!Creatures | |||
|- | |- | ||
|align=center| | |rowspan=2 align=center|3 | ||
| | |Spawn 1 | ||
| | | | ||
* [[Tumerok Gladiator]] | |||
* [[Tumerok Priest]] | |||
|- | |- | ||
| | |Spawn 2 | ||
| | | | ||
* [[Crazed Zharalim]] | |||
* [[Demented Zharalim]] | |||
* [[Maddened Zharalim]] | |||
|- | |- | ||
!Room | |||
!Spawn | |||
!Creatures | |||
|- | |- | ||
|align=center| | |rowspan=2 align=center|4 | ||
| | |Spawn 1 | ||
| | |||
* [[Black Phyntos Hive]] | |||
* [[Black Phyntos Swarm]] | |||
* [[Black Phyntos Wasp]] | |||
* [[White Phyntos Wasp]] | |||
|- | |- | ||
| | |Spawn 2 | ||
| | |||
* [[Altered Drudge]] | |||
* [[Augmented Drudge]] | |||
* [[Kerthump, the Ear Taker]] | |||
* [[Baktak, the Human Slayer]] | |||
|- | |- | ||
!Room | |||
!Spawn | |||
!Creatures | |||
|- | |- | ||
|align=center| | |rowspan=2 align=center|5 | ||
| | |Spawn 1 | ||
| | |||
* [[Corrosion Wisp]] | |||
* [[Cursed Wisp]] | |||
* [[Fire Wisp]] | |||
* [[Stasis Wisp]] | |||
* [[Strife Wisp]] | |||
|- | |- | ||
|Spawn 2 | |||
| | |||
* [[Amethyst Gromnie]] | |||
* [[Brass Gromnie]] | |||
* [[Emerald Gromnie]] | |||
* [[Ruby Gromnie]] | |||
* [[Sapphire Gromnie]] | |||
|} | |} | ||
== Dungeons & Maps == | |||
{{Dungeon Table | |||
| Table Rows = | |||
{{Dungeon Maps | |||
| Dungeon = Colosseum | |||
| Coordinates = 11.3S, 37.6E | |||
| Wiki Map File = | |||
}} | |||
}} | |||
== Rewards == | |||
{{Rewards Table | |||
| Quest Task = Complete room 1 | |||
| Max XP Reward = 10,000 | |||
| Percent of Level = | |||
| Level Cap = | |||
| Title Reward = Scrapper | |||
}} | |||
{{Rewards Table | |||
| Quest Task = Complete room 2 | |||
| Max XP Reward = 50,000 | |||
| Percent of Level = | |||
| Level Cap = | |||
| Title Reward = Arena Rat | |||
}} | |||
{{Rewards Table | |||
| Quest Task = Complete room 3 | |||
| Max XP Reward = 100,000 | |||
| Percent of Level = | |||
| Level Cap = | |||
| Title Reward = Arena Custodian | |||
}} | |||
{{Rewards Table | |||
| Quest Task = Complete room 4 | |||
| Max XP Reward = 150,000 | |||
| Percent of Level = | |||
| Level Cap = | |||
| Title Reward = Drudge Dread | |||
}} | |||
{{Rewards Table | |||
| Quest Task = Complete room 5 | |||
| Max XP Reward = 200,000 | |||
| Percent of Level = | |||
| Level Cap = | |||
| Title Reward = Contender | |||
}} | |||
== Images == | |||
Click image for full size version. | |||
<gallery widths=200px heights=200px perrow=3> | |||
File:Master Arbitrator Live.jpg|Master Arbitrator | |||
File:Colosseum Ticket Vendor Live.jpg|Colosseum Ticket Vendor | |||
</gallery> | |||
== Dialog == | |||
{{Dialog| | |||
;Opening Dialog | |||
|Master Arbitrator tells you, "Welcome to Colosseum! Colosseum begins. Enter the Colosseum. This is the time for challenge. Be strong, and you will be rewarded." | |||
|Master Arbitrator tells you, "Here citizens from Habreous, Yalaini and Dericost match their skills against the greatest gladiators, warriors and mages in the Empire!" | |||
|Master Arbitrator tells you, "If you wish to fight as a gladiator in the Arena I will require you to purchase a ticket from the Ticket Vendors over there. We do need to keep the place running don't we?" | |||
|Master Arbitrator tells you, "Also, I warn you now. Prepare your fellowship ahead of time. Once you pay me you cannot change your registered group and only that group will be allowed into the Arena I assign you. After you enter the Arena you must wait one hour before recieving your reward. Our gladiators need time to rest between fights." | |||
}} | |||
== Update History == | |||
{{Update History| | |||
[[Rekindling the Light]] | |||
* Quest introduced. | |||
}} | |||
[[Category:Colosseum]] | [[Category:Colosseum]] | ||
Latest revision as of 16:44, 29 April 2021
Related topics: Colosseum
| Walkthrough & Notes Dungeons & Maps Rewards Images Dialog Update History |
| Colosseum Arena | |
|---|---|
| Level: | Any |
| Type: | Locked Fellowship |
| Starts With: | Master Arbitrator |
| Starts At: | Colosseum |
| Route: | Yanshi to 11.3S, 37.6E |
| Time to Complete: | 1 Hour |
| Repeat: | 1 Hour |
Overview
Also known as "Colosseum Flagging", the first 5 arena's of the Colosseum are usually only accessed by younger toons and/or those who wish to flag to be able to do the Colosseum Bosses.
If you're interested in doing the tougher rooms beyond room 5, see the Advanced Colosseum Arena.
Walkthrough & Notes
- Exchange five MMDs or one tier 1/2 rare gem for a Colosseum Ticket from the Colosseum Ticket Vendor.
- Hand the ticket to the Master Arbitrator to flag the fellowship to enter the arena.
- Enter the Colosseum Arena using the door to the left of the Master Arbitrator.
- Progress through 5 rooms of the arena within 1 hour. See the room guide below to prepare for what creatures you will encounter in the standard arena.
- Warning: You must use the exit door to have completed a room. For example, killing the spawn in room 4 then using the door and entering room 5 counts as having beaten 4.
- Once your timer is up, speak to the Master Arbitrator to receive your rewards.
- Rooms of the Colosseum Arena
| Room | Spawn | Creatures |
|---|---|---|
| 1 | Spawn 1 | |
| Spawn 2 | ||
| Room | Spawn | Creatures |
| 2 | Spawn 1 | |
| Spawn 2 | ||
| Room | Spawn | Creatures |
| 3 | Spawn 1 | |
| Spawn 2 | ||
| Room | Spawn | Creatures |
| 4 | Spawn 1 | |
| Spawn 2 | ||
| Room | Spawn | Creatures |
| 5 | Spawn 1 | |
| Spawn 2 |
Dungeons & Maps
| Dungeon | Coordinates | Wiki Map | ACmaps |
|---|---|---|---|
| Colosseum | 11.3S, 37.6E | -- | -- |
Rewards
| Complete room 1 | |
|---|---|
| Experience: | 10,000 (??% up to level ??) |
| Titles: | Scrapper |
| Complete room 2 | |
|---|---|
| Experience: | 50,000 (??% up to level ??) |
| Titles: | Arena Rat |
| Complete room 3 | |
|---|---|
| Experience: | 100,000 (??% up to level ??) |
| Titles: | Arena Custodian |
| Complete room 4 | |
|---|---|
| Experience: | 150,000 (??% up to level ??) |
| Titles: | Drudge Dread |
| Complete room 5 | |
|---|---|
| Experience: | 200,000 (??% up to level ??) |
| Titles: | Contender |
Images
Click image for full size version.
-
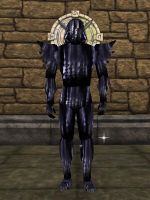
Master Arbitrator
-
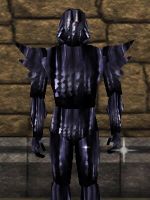
Colosseum Ticket Vendor


Dialog
- Opening Dialog
- Master Arbitrator tells you, "Welcome to Colosseum! Colosseum begins. Enter the Colosseum. This is the time for challenge. Be strong, and you will be rewarded."
- Master Arbitrator tells you, "Here citizens from Habreous, Yalaini and Dericost match their skills against the greatest gladiators, warriors and mages in the Empire!"
- Master Arbitrator tells you, "If you wish to fight as a gladiator in the Arena I will require you to purchase a ticket from the Ticket Vendors over there. We do need to keep the place running don't we?"
- Master Arbitrator tells you, "Also, I warn you now. Prepare your fellowship ahead of time. Once you pay me you cannot change your registered group and only that group will be allowed into the Arena I assign you. After you enter the Arena you must wait one hour before recieving your reward. Our gladiators need time to rest between fights."
Update History
|