Seed of Power: Difference between revisions
imported>Sucamarto No edit summary |
imported>Darkmurkrow No edit summary |
||
| Line 8: | Line 8: | ||
| Quest Type = Solo/Group | | Quest Type = Solo/Group | ||
| Kill Task = False | | Kill Task = False | ||
| Start Location = 63.1S, 65.5W | | Start Location = 63.1S, 65.5W near Center of Obsidian Plains | ||
| Timer = | | Timer = 20 hours | ||
| Time to Complete = 30 minutes | | Time to Complete = 30 minutes | ||
| Level Restrictions = 180+ | | Level Restrictions = 180+ | ||
| Level Suggestions = 180+ | | Level Suggestions = 180+ | ||
| Contracts = | | Contracts = | ||
| Item Rewards = [[Lightning Cloud]],<br>[[Legendary | | Item Rewards = [[Lightning Cloud]],<br/>4 [[Aged Legendary Key]]s | ||
| Luminance Reward = 15,000 | | Luminance Reward = 15,000 | ||
| Max XP Reward = | | Max XP Reward = 125,000,000 | ||
| Titles = | | Titles = None | ||
| MMD Reward = 7 | |||
| Hub Quest = | | Hub Quest = | ||
| | | | ||
| Line 30: | Line 31: | ||
}} | }} | ||
== Quest Overview == | == Quest Overview == | ||
Help the [[ | Help the [[Virindi Delegate (Emotions Unbound)|Virindi Delegate]] investigate strange power surges emanating from the [[Obsidian Plains]]. | ||
This quest preceded the arrival of the Rynthid Virindi on the Obsidian Plains. As a result, getting into the dungeon portals is now more dangerous. | |||
== Walk Through == | == Walk Through == | ||
# | # Optional: Talk to the [[Virindi Delegate (Emotions Unbound)|Virindi Delegate]] located at the [[Encampment near Rynthid Infested Plains]]. | ||
#* | #* Route: Use [[Rynthid Recall]] or a [[Dangerous Portal Device]] at a mansion to get to the [[Center of the Obsidian Plains]]. | ||
# Head west to the [[Rynthid Crystal Access Device]] at 63.1S, 65.5W. It is surrounded by 3 dungeons, all are lvl 180+ and cannot be tied/summoned. | # Head west to the [[Rynthid Crystal Access Device]] at 63.1S, 65.5W. It is surrounded by 3 dungeons, all are lvl 180+ and cannot be tied/summoned. | ||
# You will need to enter | #* It is best to stop about half a click from dungeons as they are surrounded by Rynthid Virindi. Then you can quickly run to the correct portal. | ||
# | # You will need to enter 3 dungeons (Seed of Anger, Seed of Misery, and Seed of Hatred) and collect 1 Splinter at the end of each one. You receive partial rewards for each splinter turned in. Turning in all 3 grants access to the final dungeon. | ||
# After the 4th lever room, you will come to | #* Note: The order in which you complete the dungeons is optional. | ||
=== Seed of Anger === | |||
# This dungeon is completely linear and has no traps. Proceed through a series of rooms with portal-looking doors. To open them, simply hit the lever in the alcove nearby. | |||
# After the 4th lever room, you will come to a final room containing more Virindi and Hollow Minions and a [[Disciple of Anger]]. | |||
# Kill the disciple and loot a [[Splinter of Anger]] from the floor (9 spawn). | |||
# Now you can take the splinter back to the Virindi Delegate or proceed to the other dungeons you have not completed yet. | |||
#* Warning: The surface portal is a hot drop with Rynthid Virindi! Use caution if using it to quickly get to the other dungeons. | |||
=== Seed of Misery === | |||
# This dungeon is also linear, and has a number of large rooms with virindi and lightning pillars in them. | |||
# Do not fight in the rooms, simply run through the large rooms, and follow the hall. The hall appears to split after each room, but in fact one route dead ends shortly. If needed, you can pause in the hallways to dispel vulns. | |||
#* Exit 1st big room to the north, go west | #* Exit 1st big room to the north, go west | ||
#* Exit 2nd big room to the east, go north | #* Exit 2nd big room to the east, go north | ||
#* Exit 3rd big room to the south, go west | #* Exit 3rd big room to the south, go west | ||
#* Exit 4th big room to the south, go east | #* Exit 4th big room to the south, go east | ||
# After the 4th large room is a smaller one with [[Chorizite Pillar]]s, more [[Virindi Confer]] and a [[Hollow Servitor]]. Kill the servitor to open the door to the east leading to the final room | # After the 4th large room is a smaller one with [[Chorizite Pillar]]s, more [[Virindi Confer]] and a blue [[Hollow Servitor]]. | ||
# | # Kill the servitor to open the door to the east leading to the final room. Use the hallway outside the room for protection/cover if necessary. | ||
# In the final room kill the [[Disciple of Misery]] and loot a [[Splinter of Misery]] from the floor. | |||
# From the drop, head east (or west) through 2 large rooms with more Lightning Pillars and | # Now you can take the splinter back to the Virindi Delegate or proceed to the other dungeons you have not completed yet. | ||
#*'''Warning | #* Warning: The surface portal is a hot drop with Rynthid Virindi! Use caution if using it to quickly get to the other dungeons. | ||
# After making the jump, follow the hall north to a large room. This room has a number of giant pits you must now jump across | |||
#* | === Seed of Hatred === | ||
# | # The dungeon path splits early to the east and to the west. Which way you go does not matter, as the 2 paths meet up later on. | ||
# Once you have all 3 | # From the drop, head east (or west) through 2 large rooms with more Lightning Pillars and Virindi, until you come to the smaller 3rd room, which has a killable door. | ||
#*Note: Each | # Killing the door opens the hall to reveal a jump. A little more than a tap jump will get you across safely. | ||
# The | #*'''Warning:''' Do NOT use a full power jump! You will hit the ceiling above and fall down into the pit. There is no way out of the pit below, and if you are vulned the floor will deal SERIOUS lightning damage! | ||
# After making the jump, follow the hall north to a large room with very bright lights. This room has a number of giant pits you must now jump across. | |||
#* '''Note:''' If you die run back and use the [[Rynthid Crystal Access Device]] again at 63.1S, 65.5W to be | # You must do 2 jumps, both of which are the same distance. With 550 jump skill, a regular half power jump will work. If your jump is lower or higher, adjust accordingly. | ||
# Head north through the 2 rooms with lightning | #* Note: If you fall, follow the hall back to the start of the dungeon. It is very possible to overshoot the jumps! If you are worried about overshooting, jump at a slight angle to give yourself more landing space. | ||
# | # After the 2 jumps, continue south down the hall to the final room with the [[Disciple of Hatred]] and his minions. Kill the [[Disciple of Hatred]] and loot a [[Splinter of Hatred]]. | ||
#*Note: If you fail this puzzle, you will be | # Now you can take the splinter back to the Virindi Delegate or proceed to the other dungeons you have not completed yet. | ||
# In this room, you must walk ONLY where the lightning goes (it does not hurt). You can even | #* Warning: The surface portal is a hot drop with Rynthid Virindi! Use caution if using it to quickly get to the other dungeons. | ||
#*Note: There is | |||
#* Note: Do not try | === Rynthid Access Dungeon === | ||
# After crossing the room, | # Once you have all 3 splinters, head to the [[Virindi Delegate (Emotions Unbound)|Virindi Delegate]] located up at the [[Encampment near Rynthid Infested Plains]] to hand them in. | ||
# Return once more to the | #* Note: Each splinter is worth 3,000 [[Luminance]] and 25,000,000 XP reward, as well as 1 [[Aged Legendary Key]] and 1 MMD, so equip any experience trinkets before handing them in. | ||
# | # The Virindi Delegate will hand back a “Focused” version of each Splinter. | ||
# Take the [[Focused Splinter of Hatred]], [[Focused Splinter of Misery]] and [[Focused Splinter of Anger]] back to the [[Rynthid Crystal Access Device]] at 63.1S, 65.5W. | |||
# Hand any 1 of the “Focused” Splinters to the device to be portaled to the [[Rynthid Access Dungeon]] (the device will take all 3 Focused Splinters when you hand 1 in). | |||
#* '''Note:''' If you die at any point after handing in the crystals, run back and use the [[Rynthid Crystal Access Device]] again at 63.1S, 65.5W to re-enter the dungeon. | |||
# There are no enemies inside this dungeon, only traps that must be avoided. | |||
#* Note: To the south of the drop is where you will be portaled if you mess up on the maze trap later in the dungeon. | |||
# Head north through the 2 very long rooms with lightning pillar traps. Strafe run to try to avoid getting hit by too many spells. | |||
# Dispel and heal as necessary, then proceed into the 3rd long room. In this room there are floor traps as well as lightning war spells. In the first half of the room are stamina draining traps and in the second half are traps which cast [[Weight of Eternity]] (300% burden) on you! Stay healed as much as possible and wait in the hallway beyond for any debuffs to expire. | |||
# Next, head through several hallways with the lightning traps that can be avoided. Then STOP before entering the next large room! | |||
# The next large room (with red lightning coursing over the ground) is the final trial. | |||
#* Note: If you fail this puzzle, you will be portaled to a small room leading to the start of the dungeon and have to run back. | |||
# In this room, you must walk ONLY where the lightning goes (it does not hurt). You can move even if there is no lightning visible, as long as you don’t stray off of the lightnings path. Take your time and go SLOW. You will traverse the entire room on your way there. | |||
#* Note: There is a [[Chorizite Chest]] in this room in the corner opposite of the exit hallway. | |||
#* Note: Do not try to jump! There is an invisible ceiling and you will simply be portaled back to the start of the dungeon. | |||
# After crossing the room safely, talk to the [[Mysterious Portal (Seed of Power)|Mysterious Portal]] in the next room (be careful of the 2 pillars in the room as well). | |||
# The portal will give you a [[Lightning Cloud]] and then drop you in the desert near [[Candeth Keep]]. | |||
# Return once more to the Virindi Delegate and talk to it to receive an additional 6,000 [[Luminance]], 1 [[Aged Legendary Key]], 1 MMD, and 50,000,000 XP. | |||
# He will also give you a lightning cloud which can be placed on housing roof hooks (it can no longer be wielded by characters). | |||
== Maps == | == Maps == | ||
| Line 71: | Line 101: | ||
| Table Rows = | | Table Rows = | ||
{{Dungeon Maps | {{Dungeon Maps | ||
| Dungeon = | | Dungeon = Splinter of Anger | ||
| Coordinates = | | Coordinates = 63.1S, 65.5W | ||
| Wiki Map File = | |||
| ACmaps ID = | |||
| Other Site Name = | |||
| Other Site Link = | |||
}} | |||
{{Dungeon Maps | |||
| Dungeon = Splinter of Misery | |||
| Coordinates = 63.1S, 65.5W | |||
| Wiki Map File = | |||
| ACmaps ID = | |||
| Other Site Name = | |||
| Other Site Link = | |||
}} | |||
{{Dungeon Maps | |||
| Dungeon = Splinter of Hatred | |||
| Coordinates = 63.1S, 65.5W | |||
| Wiki Map File = | |||
| ACmaps ID = | |||
| Other Site Name = | |||
| Other Site Link = | |||
}} | |||
{{Dungeon Maps | |||
| Dungeon = Rynthid Access Dungeon | |||
| Coordinates = 63.1S, 65.5W | |||
| Wiki Map File = | | Wiki Map File = | ||
| ACmaps ID = | | ACmaps ID = | ||
| Line 83: | Line 137: | ||
{{Item Table|Caption=Quest Items|Splinter of Anger|Splinter of Misery|Splinter of Hatred}} | {{Item Table|Caption=Quest Items|Splinter of Anger|Splinter of Misery|Splinter of Hatred}} | ||
{{Item Table|Caption=|Focused Splinter of Anger|Focused Splinter of Misery|Focused Splinter of Hatred}} | {{Item Table|Caption=|Focused Splinter of Anger|Focused Splinter of Misery|Focused Splinter of Hatred}} | ||
{{Item Table|Caption=Rewards|Legendary | {{Item Table|Caption=Rewards|Aged Legendary Key|Lightning Cloud}} | ||
{{Item Table|Caption=Objects|Chorizite Chest}} | {{Item Table|Caption=Objects|Chorizite Chest}} | ||
== Experience Rewards == | == Experience Rewards == | ||
{{Quest Experience Table | {{Quest Experience Table | ||
| Repeat Differs = False | | Repeat Differs = False | ||
| Line 106: | Line 146: | ||
{{Quest Task | {{Quest Task | ||
| Description = | | Description = | ||
| Max XP = | | Max XP = 125,000,000 | ||
| Percent of Level = | | Percent of Level = | ||
| Level Cap = | | Level Cap = | ||
}} | }} | ||
}} | }} | ||
| Line 208: | Line 229: | ||
== Notes == | == Notes == | ||
* | * During the [[Emotions Unbound]] event, the quest NPC was changed to [[Virindi Delegate (Emotions Unbound)|Virindi Delegate]], as the [[Vision of Horror (Emotions Unbound)|Vision of Horror]] was changed to be the NPC for [[Rynthid Foothold]]. | ||
* During the [[Emotions Unbound]] event, the [[Lightning Cloud]] item was made to be no longer wieldable by players. | |||
* During the [[Shattered Masks]] event, the [[Legendary Token]] rewards were replaced by [[Aged Legendary Key]]s and MMDs. | |||
Revision as of 02:04, 12 December 2013
| Walkthrough & Notes Dungeons & Maps Rewards Images Dialog Update History |
| Seed of Power | |
|---|---|
| Level: | ?? |
| Type: | Solo/Group |
| Starts At: | ?? |
| Time to Complete: | 30 minutes |
| Repeat: | ?? |
Quest Overview
Help the Virindi Delegate investigate strange power surges emanating from the Obsidian Plains.
This quest preceded the arrival of the Rynthid Virindi on the Obsidian Plains. As a result, getting into the dungeon portals is now more dangerous.
Walk Through
- Optional: Talk to the Virindi Delegate located at the Encampment near Rynthid Infested Plains.
- Route: Use Rynthid Recall or a Dangerous Portal Device at a mansion to get to the Center of the Obsidian Plains.
- Head west to the Rynthid Crystal Access Device at 63.1S, 65.5W. It is surrounded by 3 dungeons, all are lvl 180+ and cannot be tied/summoned.
- It is best to stop about half a click from dungeons as they are surrounded by Rynthid Virindi. Then you can quickly run to the correct portal.
- You will need to enter 3 dungeons (Seed of Anger, Seed of Misery, and Seed of Hatred) and collect 1 Splinter at the end of each one. You receive partial rewards for each splinter turned in. Turning in all 3 grants access to the final dungeon.
- Note: The order in which you complete the dungeons is optional.
Seed of Anger
- This dungeon is completely linear and has no traps. Proceed through a series of rooms with portal-looking doors. To open them, simply hit the lever in the alcove nearby.
- After the 4th lever room, you will come to a final room containing more Virindi and Hollow Minions and a Disciple of Anger.
- Kill the disciple and loot a Splinter of Anger from the floor (9 spawn).
- Now you can take the splinter back to the Virindi Delegate or proceed to the other dungeons you have not completed yet.
- Warning: The surface portal is a hot drop with Rynthid Virindi! Use caution if using it to quickly get to the other dungeons.
Seed of Misery
- This dungeon is also linear, and has a number of large rooms with virindi and lightning pillars in them.
- Do not fight in the rooms, simply run through the large rooms, and follow the hall. The hall appears to split after each room, but in fact one route dead ends shortly. If needed, you can pause in the hallways to dispel vulns.
- Exit 1st big room to the north, go west
- Exit 2nd big room to the east, go north
- Exit 3rd big room to the south, go west
- Exit 4th big room to the south, go east
- After the 4th large room is a smaller one with Chorizite Pillars, more Virindi Confer and a blue Hollow Servitor.
- Kill the servitor to open the door to the east leading to the final room. Use the hallway outside the room for protection/cover if necessary.
- In the final room kill the Disciple of Misery and loot a Splinter of Misery from the floor.
- Now you can take the splinter back to the Virindi Delegate or proceed to the other dungeons you have not completed yet.
- Warning: The surface portal is a hot drop with Rynthid Virindi! Use caution if using it to quickly get to the other dungeons.
Seed of Hatred
- The dungeon path splits early to the east and to the west. Which way you go does not matter, as the 2 paths meet up later on.
- From the drop, head east (or west) through 2 large rooms with more Lightning Pillars and Virindi, until you come to the smaller 3rd room, which has a killable door.
- Killing the door opens the hall to reveal a jump. A little more than a tap jump will get you across safely.
- Warning: Do NOT use a full power jump! You will hit the ceiling above and fall down into the pit. There is no way out of the pit below, and if you are vulned the floor will deal SERIOUS lightning damage!
- After making the jump, follow the hall north to a large room with very bright lights. This room has a number of giant pits you must now jump across.
- You must do 2 jumps, both of which are the same distance. With 550 jump skill, a regular half power jump will work. If your jump is lower or higher, adjust accordingly.
- Note: If you fall, follow the hall back to the start of the dungeon. It is very possible to overshoot the jumps! If you are worried about overshooting, jump at a slight angle to give yourself more landing space.
- After the 2 jumps, continue south down the hall to the final room with the Disciple of Hatred and his minions. Kill the Disciple of Hatred and loot a Splinter of Hatred.
- Now you can take the splinter back to the Virindi Delegate or proceed to the other dungeons you have not completed yet.
- Warning: The surface portal is a hot drop with Rynthid Virindi! Use caution if using it to quickly get to the other dungeons.
Rynthid Access Dungeon
- Once you have all 3 splinters, head to the Virindi Delegate located up at the Encampment near Rynthid Infested Plains to hand them in.
- Note: Each splinter is worth 3,000 Luminance and 25,000,000 XP reward, as well as 1 Aged Legendary Key and 1 MMD, so equip any experience trinkets before handing them in.
- The Virindi Delegate will hand back a “Focused” version of each Splinter.
- Take the Focused Splinter of Hatred, Focused Splinter of Misery and Focused Splinter of Anger back to the Rynthid Crystal Access Device at 63.1S, 65.5W.
- Hand any 1 of the “Focused” Splinters to the device to be portaled to the Rynthid Access Dungeon (the device will take all 3 Focused Splinters when you hand 1 in).
- Note: If you die at any point after handing in the crystals, run back and use the Rynthid Crystal Access Device again at 63.1S, 65.5W to re-enter the dungeon.
- There are no enemies inside this dungeon, only traps that must be avoided.
- Note: To the south of the drop is where you will be portaled if you mess up on the maze trap later in the dungeon.
- Head north through the 2 very long rooms with lightning pillar traps. Strafe run to try to avoid getting hit by too many spells.
- Dispel and heal as necessary, then proceed into the 3rd long room. In this room there are floor traps as well as lightning war spells. In the first half of the room are stamina draining traps and in the second half are traps which cast Weight of Eternity (300% burden) on you! Stay healed as much as possible and wait in the hallway beyond for any debuffs to expire.
- Next, head through several hallways with the lightning traps that can be avoided. Then STOP before entering the next large room!
- The next large room (with red lightning coursing over the ground) is the final trial.
- Note: If you fail this puzzle, you will be portaled to a small room leading to the start of the dungeon and have to run back.
- In this room, you must walk ONLY where the lightning goes (it does not hurt). You can move even if there is no lightning visible, as long as you don’t stray off of the lightnings path. Take your time and go SLOW. You will traverse the entire room on your way there.
- Note: There is a Chorizite Chest in this room in the corner opposite of the exit hallway.
- Note: Do not try to jump! There is an invisible ceiling and you will simply be portaled back to the start of the dungeon.
- After crossing the room safely, talk to the Mysterious Portal in the next room (be careful of the 2 pillars in the room as well).
- The portal will give you a Lightning Cloud and then drop you in the desert near Candeth Keep.
- Return once more to the Virindi Delegate and talk to it to receive an additional 6,000 Luminance, 1 Aged Legendary Key, 1 MMD, and 50,000,000 XP.
- He will also give you a lightning cloud which can be placed on housing roof hooks (it can no longer be wielded by characters).
Maps
| Dungeon | Coordinates | Wiki Map | ACmaps |
|---|---|---|---|
| Splinter of Anger | 63.1S, 65.5W | -- | -- |
| Splinter of Misery | 63.1S, 65.5W | -- | -- |
| Splinter of Hatred | 63.1S, 65.5W | -- | -- |
| Rynthid Access Dungeon | 63.1S, 65.5W | -- | -- |
Items and Objects
![]() Splinter of Anger
Splinter of Anger![]() Splinter of Misery
Splinter of Misery![]() Splinter of Hatred
Splinter of Hatred
![]() Focused Splinter of Anger
Focused Splinter of Anger![]() Focused Splinter of Misery
Focused Splinter of Misery![]() Focused Splinter of Hatred
Focused Splinter of Hatred
![]() Aged Legendary Key
Aged Legendary Key![]() Lightning Cloud
Lightning Cloud
Experience Rewards
Images
Click image for full size version.
-

-

-
-
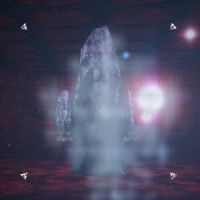
Puzzle Room 4
-

-

-


_Live.jpg)

_Live.jpg)
_Live.jpg)
Lore & Dialog
Vision of Horror tells you, "Greetings. The Council was wise in their banishment of the Curator of Torment, but a worthy ally was lost due to the Curator's trickery and deception."
Vision of Horror tells you, "It is unfortunate that our discovery was presented to the Council too late to save the Reaver from an unjustified fate. We must not let the loss be in vain."
Vision of Horror tells you, "A region inside of the Obsidian Plains is boiling with a powerful energy unlike anything Dereth has seen before. The Council is deeply concerned and requests your assistance once again."
Vision of Horror tells you, "Journey nearby, to the center of the Obsidian Plains and find the cause. There is no time to lose, you must make haste."
You allow Vision of Horror to examine your Splinter of Misery.
You hand over 1 of your Splinter of Miserys.
Vision of Horror tells you, "This is as the Council feared. Raw emotion being channeled into the Curator's lackeys."
Vision of Horror tells you, "Channeling pure misery into a Virindi would have created a being determined to spread agony to all the creatures of this land."
A purple light quickly flashes from behind the Vision of Horror's mask.
Vision of Horror tells you, "The power within the splinter has been focused within this fragment. We must find a way to use this newly contained energy to scrub the land clean of the Curator's twisted visions."
You've earned 25,000,000 experience.
You've earned 3,000 Luminance.
Vision of Horror gives you 5 Legendary Tokens.
Vision of Horror gives you Focused Splinter of Misery.
You allow Vision of Horror to examine your Splinter of Hatred.
You hand over 1 of your Splinter of Hatreds.
Vision of Horror tells you, "This is just as the Council feared. Raw emotion being channeled into the Curator's lackeys."
Vision of Horror tells you, "The chaos that a being infused with pure hatred could cause is unimaginable."
A red light quickly flashes from behind the Vision of Horror's mask.
Vision of Horror tells you, "The power within the splinter has been focused within this fragment. We should be able to use this energy to further our cause and remove all signs that the Curator of Torment ever corrupted Dereth."
You've earned 25,000,000 experience.
You've earned 3,000 Luminance.
Vision of Horror gives you 5 Legendary Tokens.
Vision of Horror gives you Focused Splinter of Hatred.
You inform the Vision of Horror of your discovery within the Obsidian Plains.
Vision of Horror tells you, "This is disturbing news. These beings you described, if they are allowed to reach Dereth, chaos and destruction will sweep across the land like a plague. I will deliver this latest information to the Council."
You allow Vision of Horror to examine your Splinter of Anger.
You hand over 1 of your Splinter of Angers.
Vision of Horror tells you, "Vision of Horror tells you, "This is as the Council feared. Raw emotion being channeled into the Curator's lackeys."
Vision of Horror tells you, "The potential for disaster with an entity fueled by pure anger is unthinkable."
A red light quickly flashes from behind the Vision of Horror's mask.
Vision of Horror tells you, "The power within the splinter has been focused within this fragment. Use this splinter to eliminate any remnant of the Curator of Torment's existence on Dereth."
You've earned 25,000,000 experience.
You've earned 3,000 Luminance.
Vision of Horror gives you 5 Legendary Tokens.
Vision of Horror gives you Focused Splinter of Anger.
Vision of Horror tells you, "The power harnessed within the three crystals appear to be connected. It is almost as if they are...communicating with each other."
Vision of Horror tells you, "It is imperative that we discover a way to use these focused energies to destroy whatever the Curator was planning. Never have I observed the Council express such concern."
You give Rynthid Crystal Access Device Focused Splinter of Anger.
A bright light burns your eyes and blinds you momentarily.
You hand over all of your Focused Splinter of Angers.
You hand over all of your Focused Splinter of Hatreds.
You hand over all of your Focused Splinter of Miserys.
You inform the Vision of Horror of your discovery within the Obsidian Plains.
Vision of Horror tells you, "This is disturbing news. These beings you described, if they are allowed to reach Dereth, chaos and destruction will sweep across the land like a plague. I will deliver this latest information to the Council."
You've earned 50,000,000 experience.
You've earned 6,000 Luminance.
Vision of Horror gives you 5 Legendary Tokens.
Vision of Horror tells you, "The details of your recent findings have been sent to the Council. They are grateful for your aid."
You may repeat this quest in 12d 22h 39m 27s.
Vision of Horror tells you, "I see you've proven your abilities to us in the past. Accept this key as a reward for your services."
You hand over 20 of your Legendary Tokens.
Vision of Horror gives you Aged Legendary Key.
Notes
- During the Emotions Unbound event, the quest NPC was changed to Virindi Delegate, as the Vision of Horror was changed to be the NPC for Rynthid Foothold.
- During the Emotions Unbound event, the Lightning Cloud item was made to be no longer wieldable by players.
- During the Shattered Masks event, the Legendary Token rewards were replaced by Aged Legendary Keys and MMDs.