Template:Map Point: Difference between revisions
imported>Tlosk No edit summary |
imported>Tlosk No edit summary |
||
| Line 63: | Line 63: | ||
You can optionally specify the marker for the points by adding a <Marker = Small> parameter. You can create new markers if desired, create a 9x9 pixel png image with transparency if it doesn't cover the entire area (center the image if not). Name the file "Map Point <Name>.png" and upload it and simply refer to it as <Name> (for example, Map Point Large.png is referenced as Large). | You can optionally specify the marker for the points by adding a <Marker = Small> parameter. You can create new markers if desired, create a 9x9 pixel png image with transparency if it doesn't cover the entire area (center the image if not). Name the file "Map Point <Name>.png" and upload it and simply refer to it as <Name> (for example, Map Point Large.png is referenced as Large). | ||
You can optionally specify a caption at the end | You can optionally specify a caption at the end, just add another pipe ( | ) after the last coordinate and then the caption you want displayed. To use a larger map, to display more than 4 points, or to specify a particular marker for each individual point, use [[Template:Map Point Plus]]. | ||
{|border=0 cellpadding=5 | {|border=0 cellpadding=5 | ||
Revision as of 15:41, 20 January 2009
Related topics: Template:Map Point Plus, Points of Interest, Wiki Templates
Syntax
{{Map Point | <Coords> | <N or S> | <Coords> | <E or W>}}

{{Map Point | | | | }}

{{Map Point | Marker = <Name>| <Coords> | <N or S> | <Coords> | <E or W> | <Popup Caption> }}

{{Map Point
 | | | | |
 | | | | |
 | | | | |
 | | | | |
}}
Usage
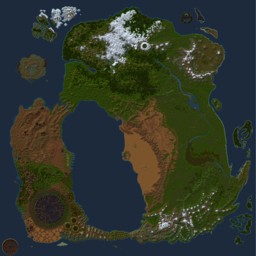
Displays a particular location on a small map of Dereth given specific coordinates. You can use either upper or lower case letters (e, w, n, s or E, W, N, S). Note that because the coordinates need to be transformed into a point on the map, if a coordinate or direction parameter is missing or malformed the page will not render correctly.
You can optionally specify the marker for the points by adding a <Marker = Small> parameter. You can create new markers if desired, create a 9x9 pixel png image with transparency if it doesn't cover the entire area (center the image if not). Name the file "Map Point <Name>.png" and upload it and simply refer to it as <Name> (for example, Map Point Large.png is referenced as Large).
You can optionally specify a caption at the end, just add another pipe ( | ) after the last coordinate and then the caption you want displayed. To use a larger map, to display more than 4 points, or to specify a particular marker for each individual point, use Template:Map Point Plus.
| For example: | |
{{Map Point|12.9|S|51.5|E}}
|
{{Map Point|Marker=Dungeon|34.9|N|54.5|E|Abandoned Mine}}
|
| displays as: | |
| For example: | |
{{Map Point
 |64|S|63.8|W
 |65.9|N|12.9|E
 |51.5|N|74.6|w
 |60.2|s|88.5|e
}}
|
{{Map Point
 |Marker=Medium
 |64|S|63.8|W|Obsidian Plains
 |65.9|N|12.9|E|Crater Village
 |51.5|N|74.6|w|Dam Reservoir
 |60.2|s|88.5|e|Mayoi Point
}}
|
| displays as: | |

