Liberation of Uziz: Difference between revisions
From Drunkapedia
imported>Metanite |
imported>An Adventurer m (updating gallery, removed deleted image) |
||
| Line 1: | Line 1: | ||
{{Quest Summary | {{Quest Summary | ||
| | | Level = 180 | ||
| | | Recommended Level = | ||
| Quest Type = Fellowship | |||
| Kill Task = | |||
| | | Starts With = [[Virindi Edifice]] | ||
| | | Starts At = 19.4S, 18.2E | ||
| | | Route = [[Al-Arqas]] to [[Ahr-Zona]] portal at 33.5S, 13.1E | ||
| | | Repeat Timer = 20 Hours | ||
| | |||
| | |||
| Time to Complete = | | Time to Complete = | ||
| Contracts = [[Contract for Uziz Abductions]] | | Contracts = [[Contract for Uziz Abductions]] | ||
}} | }} | ||
== | == Overview == | ||
== Walkthrough & Notes == | |||
# Travel to the [[Virindi Edifice]] in the desert at 19.4S 18.2E. | |||
== | #* Route: [[Al-Arqas]] to [[Ahr-Zona]] portal at 33.5S, 13.1E | ||
# Travel to the [[Virindi Edifice]] in the desert at 19.4S 18.2E | #* {{Optional}} Pick up {{Itemlink|Dream Beacon}} text on the floor outside the portal. | ||
#* Route: [[Al-Arqas]] to [[Ahr-Zona]] | # You will enter into a room with 3 hallways branching off to the left, right, and middle | ||
# | #* Note: The dungeon is full of levers. Be careful as most of these are fake and drain your health when used. | ||
# | # Head left at the first split and make your way past the hollow minions and simulacra to a lever on the wall with blood spots below it. | ||
#* Route:. After you make the initial turn left, take a right (north) at the first split and then another right (north) into a small room. | |||
#* From here proceed west until you come to another T intersection. Head left (east) into the small room and up the ramp | |||
# The | #* Up the ramp in the first small room is a lever with puddles of blood under it. | ||
# Head left at the first split, | # Hit the bloodied lever, then continue up and jump down. From here, return to the main entrance with the 3 splits | ||
# | |||
# Up the ramp in the first small room is a lever with puddles of blood under it | |||
# | |||
# From the main entrance again, take the right hallway followed by another right, then proceed straight through the now-open lever door and jump over the pit. | # From the main entrance again, take the right hallway followed by another right, then proceed straight through the now-open lever door and jump over the pit. | ||
# Continue through 3 rooms until you come to the | # Continue through 3 rooms until you come to the 4 room (a small square room). In here you will find a jumping puzzle above you (if you come to a door opening to a pit, you have gone too far). | ||
# Make your way up the jumping puzzle. The platforms are grates, and may be difficult to see (try using overhead view). At the top of the jumping puzzle is lever | # Make your way up the jumping puzzle. The platforms are grates, and may be difficult to see (try using overhead view). At the top of the jumping puzzle is a lever, hit it. | ||
# After hitting the lever, jump down and continue onward to the door opening to a pit. Jump down, and | # After hitting the lever, jump down and continue onward to the door opening to a pit. Jump down, and head west back to the main entrance. | ||
# From the main entrance take the middle path. Continue north until you come to an open door and a pit. Jump across, and continue until you find a lever with a blue flame above it. | # From the main entrance take the middle path. Continue north until you come to an open door and a pit. Jump across, and continue until you find a lever with a blue flame above it. Pull it. | ||
# After pulling the lever, continue on | # After pulling the lever, continue on opening doors as you go. When you come to a pit, jump down and head south back to the main entrance | ||
# From the main entrance, head right again, followed by a left. Follow the hall to the now-open door and jump down. | |||
# At the bottom you will find the [[Curator of Torment]]. When you enter the room he will summon and kill Uziz's Town Crier. (Stand back or he will kill you too!). He will then summon a [[Simulacrum Shifter]]. If you let him do that, The boss casts life protection over himself (like anek'shays) and summons lightning elementals that will hit hard, war and vuln. For a short fight, a life mage should do the imperil+vulns (debuffing his weapon next) while the others attack him immediately with AR/Soulbound weapons. (use Slash/Bludgeon/Pierce damage) | |||
#* '''WARNING!!:''' If you fight the boss outside of the room and kill him, there is a triggering floor plate at the entrance of the room that will re trigger the event if you walk on it : Face the entrance and do a small power forward jump over it. | |||
# Kill the boss and loot the {{Itemlink|Door Key (Virindi Edifice)}}. Use the key on the locked door ahead, jump over the pit, and continue until you find the [[Vision of Horror (Virindi Edifice)|Vision of Horror]], along with the [[Uziz]] townsfolk. | |||
# From the main entrance, head right, followed by a left. Follow the hall to | # Talk to the [[Vision of Horror (Virindi Edifice)|Virindi Delegate]] for your rewards. | ||
# | |||
#* '''WARNING!:''' If you fight the boss outside of the room and kill him, there is a triggering floor plate at the entrance of the room that will re | |||
# Kill the boss and loot the | |||
# Talk to the [[ | |||
== Maps == | == Dungeons & Maps == | ||
{{Dungeon Table | {{Dungeon Table | ||
| Table Rows = | | Table Rows = | ||
| Line 73: | Line 42: | ||
| Dungeon = Virindi Edifice | | Dungeon = Virindi Edifice | ||
| Coordinates = 19.4S, 18.2E | | Coordinates = 19.4S, 18.2E | ||
| Wiki Map File = 5867.png | | Wiki Map File = 5867.png | ||
}} | }} | ||
}} | }} | ||
== | == Rewards == | ||
{{Rewards Table | |||
{{ | | Quest Task = | ||
| | | Item Reward = | ||
{{ | * {{Icon Link|Legendary Key}} (2 uses) | ||
| | * {{Icon Link|Trade Note (250,000)}} (x9) | ||
| | | Max XP Reward = 275,000,000 | Percent of Level = Fixed | Level Cap = | ||
| Luminance Reward = 20,000 | |||
| Title Reward = Liberator of Uziz | |||
}} | }} | ||
== Images == | == Images == | ||
Click image for full size version. | Click image for full size version. | ||
<gallery> | |||
<gallery | Virindi Edifice Live.jpg|Portal to the Virindi Edifice | ||
Simulacrum Shifter Live.jpg|Simulacrum Shifter | |||
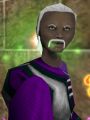
Virindi Delegate (Virindi Edifice) Live.jpg|Virindi Delegate | |||
</gallery> | </gallery> | ||
== | == Dialog == | ||
{{Dialog| | |||
;Opening Dialog | |||
No starting quest NPC. | |||
;Curator of Torment | |||
|Curator of Torment says, "The meatbags again attempt to interfere with my vision!" | |||
|The room begins to crackle with energy. | |||
|Curator of Torment says, "This insolence must be met with punishment. Know that your intrusion has lead to the death of one of your kind." | |||
|The Curator casts its gaze toward the Town Crier. | |||
|Curator of Torment says, "You my child. An example must be made. You have been chosen." | |||
|Curator of Torment says, "This blood is on your hands." | |||
|Curator of Torment says, "Your feeble attempts to stop me again fall unsuccessful. These humans are mine." | |||
|Curator of Torment says, "Come forth my archetype! Obey me! Kill our unwelcomed guests! Their suffering is your reward." | |||
;Rewards Dialog | |||
|Virindi Delegate tells you, "A disturbance has been sensed. I was sent to investigate what could cause such a tidal wave of emotions to rage outwards." | |||
|Virindi Delegate tells you, "The settlement you call Uziz was the center of this rift." | |||
|Virindi Delegate tells you, "To discover one of the enlightened is torturing and experimenting on the humans of this land is as unsettling as it is dangerous." | |||
|Virindi Delegate tells you, "The Reaver of Dreams will be informed of this immediately." | |||
|Virindi Delegate tells you, "First things first, these humans must be released." | |||
|A low pitched humming sound resonates through the chamber. | |||
|Virindi Delegate tells you, "Worry not for their fate. The wards trapping them have now begun to fall and soon they will fully recover from their stasis. I will return them to their town once their minds and bodies have been released and healed." | |||
|Virindi Delegate tells you, "Your kind should be grateful for your bravery." | |||
|You've earned 275,000,000 experience. | |||
|You've earned 20,000 Luminance. | |||
|Virindi Delegate gives you Legendary Key. | |||
|You have been awarded the title of "Liberator of Uziz" | |||
}} | |||
== Update History == | |||
{{Update History| | |||
[[Disturbance in the Desert]] | |||
* Quest introduced. | |||
[[Emotions Unbound]] | |||
* [[Vision of Horror]] replaced with [[Virindi Delegate]] | |||
[[The Quest for Freedom]] | |||
* Repeat timer changed from 13 days to 20 hours. | |||
}} | |||
Latest revision as of 07:41, 27 July 2021
| Walkthrough & Notes Dungeons & Maps Rewards Images Dialog Update History |
| Liberation of Uziz | |
|---|---|
| Level: | 180 |
| Type: | Fellowship |
| Starts With: | Virindi Edifice |
| Starts At: | 19.4S, 18.2E |
| Route: | Al-Arqas to Ahr-Zona portal at 33.5S, 13.1E |
| Repeat: | 20 Hours |
| Contracts: | Contract for Uziz Abductions |
Overview
Walkthrough & Notes
- Travel to the Virindi Edifice in the desert at 19.4S 18.2E.
- Route: Al-Arqas to Ahr-Zona portal at 33.5S, 13.1E
- Optional: Pick up Dream Beacon text on the floor outside the portal.
- You will enter into a room with 3 hallways branching off to the left, right, and middle
- Note: The dungeon is full of levers. Be careful as most of these are fake and drain your health when used.
- Head left at the first split and make your way past the hollow minions and simulacra to a lever on the wall with blood spots below it.
- Route:. After you make the initial turn left, take a right (north) at the first split and then another right (north) into a small room.
- From here proceed west until you come to another T intersection. Head left (east) into the small room and up the ramp
- Up the ramp in the first small room is a lever with puddles of blood under it.
- Hit the bloodied lever, then continue up and jump down. From here, return to the main entrance with the 3 splits
- From the main entrance again, take the right hallway followed by another right, then proceed straight through the now-open lever door and jump over the pit.
- Continue through 3 rooms until you come to the 4 room (a small square room). In here you will find a jumping puzzle above you (if you come to a door opening to a pit, you have gone too far).
- Make your way up the jumping puzzle. The platforms are grates, and may be difficult to see (try using overhead view). At the top of the jumping puzzle is a lever, hit it.
- After hitting the lever, jump down and continue onward to the door opening to a pit. Jump down, and head west back to the main entrance.
- From the main entrance take the middle path. Continue north until you come to an open door and a pit. Jump across, and continue until you find a lever with a blue flame above it. Pull it.
- After pulling the lever, continue on opening doors as you go. When you come to a pit, jump down and head south back to the main entrance
- From the main entrance, head right again, followed by a left. Follow the hall to the now-open door and jump down.
- At the bottom you will find the Curator of Torment. When you enter the room he will summon and kill Uziz's Town Crier. (Stand back or he will kill you too!). He will then summon a Simulacrum Shifter. If you let him do that, The boss casts life protection over himself (like anek'shays) and summons lightning elementals that will hit hard, war and vuln. For a short fight, a life mage should do the imperil+vulns (debuffing his weapon next) while the others attack him immediately with AR/Soulbound weapons. (use Slash/Bludgeon/Pierce damage)
- WARNING!!: If you fight the boss outside of the room and kill him, there is a triggering floor plate at the entrance of the room that will re trigger the event if you walk on it : Face the entrance and do a small power forward jump over it.
- Kill the boss and loot the Door Key (Virindi Edifice). Use the key on the locked door ahead, jump over the pit, and continue until you find the Vision of Horror, along with the Uziz townsfolk.
- Talk to the Virindi Delegate for your rewards.
Dungeons & Maps
| Dungeon | Coordinates | Wiki Map | ACmaps |
|---|---|---|---|
| Virindi Edifice | 19.4S, 18.2E | File:5867.png 5867.png | -- |
Rewards
| Experience: | 275,000,000 (Fixed) |
| Luminance: | 20,000 |
| Titles: | Liberator of Uziz |
| Items: | |
| |
Images
Click image for full size version.
-
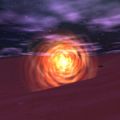
Portal to the Virindi Edifice
-
Simulacrum Shifter
-

Virindi Delegate


_Live.jpg)
Dialog
- Opening Dialog
No starting quest NPC.
- Curator of Torment
- Curator of Torment says, "The meatbags again attempt to interfere with my vision!"
- The room begins to crackle with energy.
- Curator of Torment says, "This insolence must be met with punishment. Know that your intrusion has lead to the death of one of your kind."
- The Curator casts its gaze toward the Town Crier.
- Curator of Torment says, "You my child. An example must be made. You have been chosen."
- Curator of Torment says, "This blood is on your hands."
- Curator of Torment says, "Your feeble attempts to stop me again fall unsuccessful. These humans are mine."
- Curator of Torment says, "Come forth my archetype! Obey me! Kill our unwelcomed guests! Their suffering is your reward."
- Rewards Dialog
- Virindi Delegate tells you, "A disturbance has been sensed. I was sent to investigate what could cause such a tidal wave of emotions to rage outwards."
- Virindi Delegate tells you, "The settlement you call Uziz was the center of this rift."
- Virindi Delegate tells you, "To discover one of the enlightened is torturing and experimenting on the humans of this land is as unsettling as it is dangerous."
- Virindi Delegate tells you, "The Reaver of Dreams will be informed of this immediately."
- Virindi Delegate tells you, "First things first, these humans must be released."
- A low pitched humming sound resonates through the chamber.
- Virindi Delegate tells you, "Worry not for their fate. The wards trapping them have now begun to fall and soon they will fully recover from their stasis. I will return them to their town once their minds and bodies have been released and healed."
- Virindi Delegate tells you, "Your kind should be grateful for your bravery."
- You've earned 275,000,000 experience.
- You've earned 20,000 Luminance.
- Virindi Delegate gives you Legendary Key.
- You have been awarded the title of "Liberator of Uziz"
Update History
|